
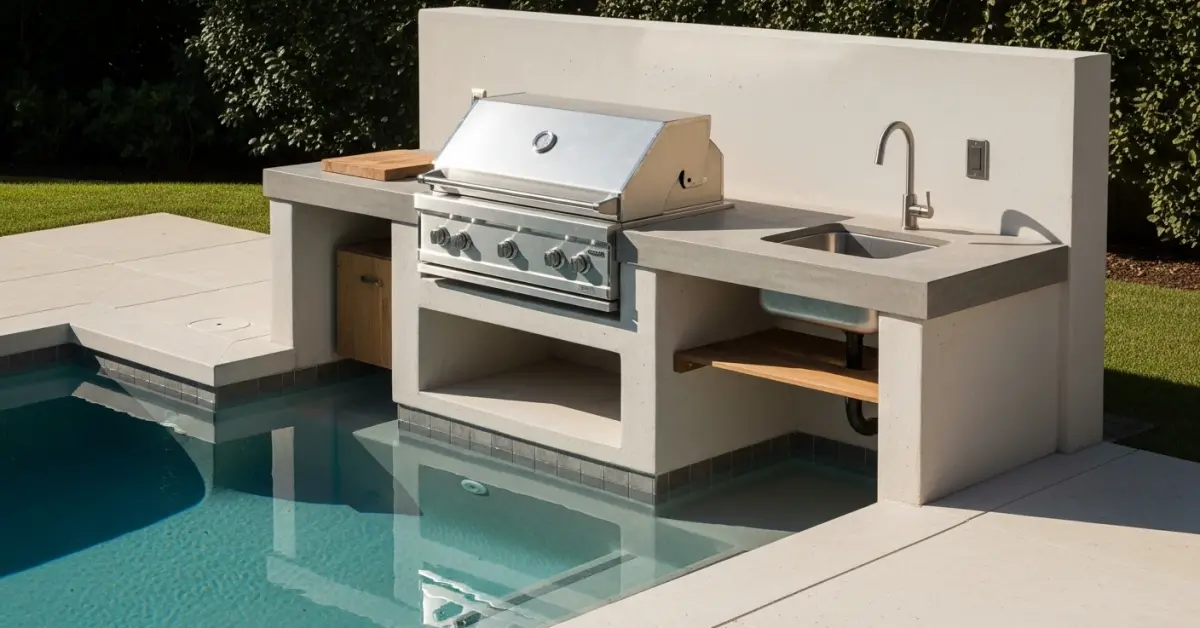
Custom Outdoor BBQ Kitchens in Pinellas County: Averting Coastal Corrosion & Structural Failure
I'm often called to beautiful waterfront homes in Tierra Verde or St. Pete Beach to diagnose a failing outdoor kitchen. The homeowner invested heavily, yet within three to five years, they're seeing rampant rust, warped cabinetry, and crumbling countertops. The root cause is almost always the same: a fundamental misunderstanding of how our unique Pinellas County coastal environment—with its intense salt spray, relentless humidity, and UV exposure—aggressively attacks standard "outdoor-rated" materials. My entire approach is built on a principle I developed after seeing these costly failures firsthand: material science must dictate design, not the other way around. A generic design that works in a dry, inland climate will lead to a catastrophic structural failure here. My methodology focuses on creating a sealed, non-reactive envelope that ensures a 20+ year lifespan, even on the most exposed properties along the Intracoastal.My Pinellas Coastal Durability Framework
Over years of projects from Clearwater to Indian Rocks Beach, I’ve refined a proprietary diagnostic and building process I call the "Coastal Durability Framework." It’s not about just picking nice-looking finishes; it's a forensic approach to material selection and construction that anticipates environmental stress. I’ve seen projects fail because a contractor used the wrong grade of stainless steel fasteners—a tiny detail that compromised the entire structure. My framework is built on three core pillars: Material Forensics, Structural Dynamics, and Appliance Isolation.Material Science: Why Standard "Outdoor-Rated" Fails in Pinellas
The single biggest mistake I see is the misuse of 304 stainless steel. While it's marketed as rust-resistant, it contains less nickel and no molybdenum, making it highly susceptible to pitting and crevice corrosion from the chloride in our salt air. I exclusively specify 316L marine-grade stainless steel for all metallic components, from cabinet doors to grill surrounds. The "L" signifies low carbon content, which further enhances corrosion resistance after welding. For countertops, I steer clients away from porous natural stones like granite, which can absorb moisture and harbor mildew in our humid climate. My go-to materials are sintered stone and Dekton. These are non-porous, UV-stable materials that won't fade under the Florida sun and can withstand the thermal shock of a hot pan being placed on a cool surface. For the core structure, I abandoned wood and steel frames years ago. My standard is a custom-fabricated, welded aluminum frame with a baked-on powder coat finish, which is inert, lightweight, and completely impervious to rust and moisture-induced warping.From Slab to Sizzle: A Step-by-Step Implementation Protocol
Executing a project to my standards requires a rigid, sequential process. Deviating from these steps is how vulnerabilities are introduced. Here is my core workflow for every custom outdoor kitchen in Pinellas County.- Phase 1: Foundation & Moisture Barrier: The process begins with the concrete slab. Before any framing is installed, I require the slab to be sealed with a two-part epoxy moisture barrier. This prevents moisture from wicking up from the ground and into the base of the kitchen island, which is a common source of internal corrosion.
- Phase 2: Frame Fabrication & Assembly: The powder-coated aluminum frame is built off-site based on precise field measurements. On-site, all connections are made with 316L stainless steel fasteners to maintain a consistent, corrosion-proof structure.
- Phase 3: Utility Integration & Shielding: All electrical and gas lines are run through waterproof conduits. I insist on using marine-grade wiring and connectors at all junction points to prevent failures caused by moisture intrusion.
- Phase 4: Appliance & Cabinetry Installation: Appliances are installed with careful attention to ventilation requirements. A poorly ventilated grill in our humid environment can trap moisture and accelerate corrosion. I create a minimum 1-inch air gap behind all appliances and ensure all cabinetry is properly sealed against the frame.
- Phase 5: Countertop & Cladding Installation: The final step is installing the sintered stone or other non-porous material. All seams are filled with a marine-grade polyurethane sealant, not standard silicone, to provide a flexible, waterproof, and UV-stable bond.
Quality Control: The Non-Negotiable Finishing Standards
The difference between a 10-year kitchen and a 25-year kitchen is in the final 5% of the work. My quality control checklist is rigorous. For example, I mandate that all countertops have a subtle 1/8-inch slope per foot to ensure water never pools. I also inspect every single fastener to confirm it's the correct 316L grade; I once caught a subcontractor using cheaper 304 screws, a mistake that would have caused rust streaks within a year. This level of granular detail is what defines a truly durable build. Have you audited the grade of stainless steel and the type of sealant specified in your current outdoor kitchen plan?Written by

Tags
custom outdoor kitchen
custom outdoor kitchens near me
custom bbq island
custom outdoor grill
custom outdoor grill station
Custom Outdoor BBQ Kitchen in Pinellas FL FAQ
What materials are best for countertops and cabinets to withstand rain and sun?
Granite and quartzite are top choices for countertops as they are highly resistant to heat from grills and will not fade under intense sun exposure. For cabinetry, marine-grade polymers or stainless steel offer the best longevity, as they will not rot, warp, or rust like wood or standard powder-coated metal. While treated wood looks appealing initially, it requires annual sealing and is susceptible to insect damage and moisture rot within 5-7 years, making the initial savings a long-term liability. Always ensure any selected material is rated specifically for outdoor use and regional climate conditions, not just 'weather-resistant'.
Do I need special permits for building an outdoor kitchen with gas and water lines?
Yes, extending utility lines like natural gas, plumbing, and dedicated electrical circuits almost always requires a municipal permit and licensed professional installation. A licensed plumber must run and test the gas line to prevent dangerous leaks, and a licensed electrician must install GFCI-protected outlets to meet safety codes for wet environments. Attempting this work without a permit can result in fines, void your homeowner's insurance in case of an accident, and create significant safety hazards. The permit process ensures the installation is inspected and complies with local building and safety codes.
How much clearance do I need between my built-in grill and the structure?
You must use an insulated jacket specifically designed for your grill model if it is being installed into any combustible structure, such as a wood or composite frame. This non-negotiable safety device creates a protective air gap, preventing the high heat from igniting the surrounding materials. Even with the jacket, manufacturers typically require a minimum of 15 cm (6 inches) of clearance to any combustible side or back walls. Ignoring the insulated jacket requirement is a primary cause of outdoor kitchen fires and is often an explicit violation of both the grill's warranty and local fire codes.
Can I place my outdoor kitchen on my existing deck or patio?
An outdoor kitchen's structure, countertops, and appliances create a significant dead load, often exceeding 900 kilograms (2,000 pounds), which most standard decks are not built to support. Before construction, a structural engineer must assess your deck's foundation and framing to confirm it can handle the concentrated weight, potentially requiring new footings and joist reinforcement. A concrete patio slab must be at least 10 cm (4 inches) thick and crack-free to provide a stable foundation. Placing a heavy kitchen on an inadequate base will lead to dangerous structural failure or slab cracking over time.
What is the most common point of failure you see in custom outdoor kitchens?
The most frequent and costly failures stem from improper water management within the structure's core. When builders fail to install weep holes, drainage channels, and a proper moisture barrier behind the veneer, water gets trapped inside the frame. This leads to mold, rust-out of steel studs, and expansion damage during freeze-thaw cycles that can crack the entire structure from the inside out. A well-designed kitchen actively manages water, directing it away from electrical components and out of the structural cavity. Ask your builder specifically about their internal drainage plan.
Is a ventilation hood really necessary for an outdoor grill?
A ventilation hood is mandatory if your outdoor kitchen is located under any type of combustible overhead structure, like a pergola, covered patio, or roof overhang. Without a hood, intense heat, smoke, and grease accumulate, creating a serious fire hazard and causing permanent staining and damage to the ceiling. The hood must be specifically rated for outdoor use, constructed from stainless steel, and have a powerful enough fan (typically 1200 CFM or higher) to effectively capture the exhaust. Forgetting this component in a covered space is a critical design flaw that compromises both safety and structural integrity.


