
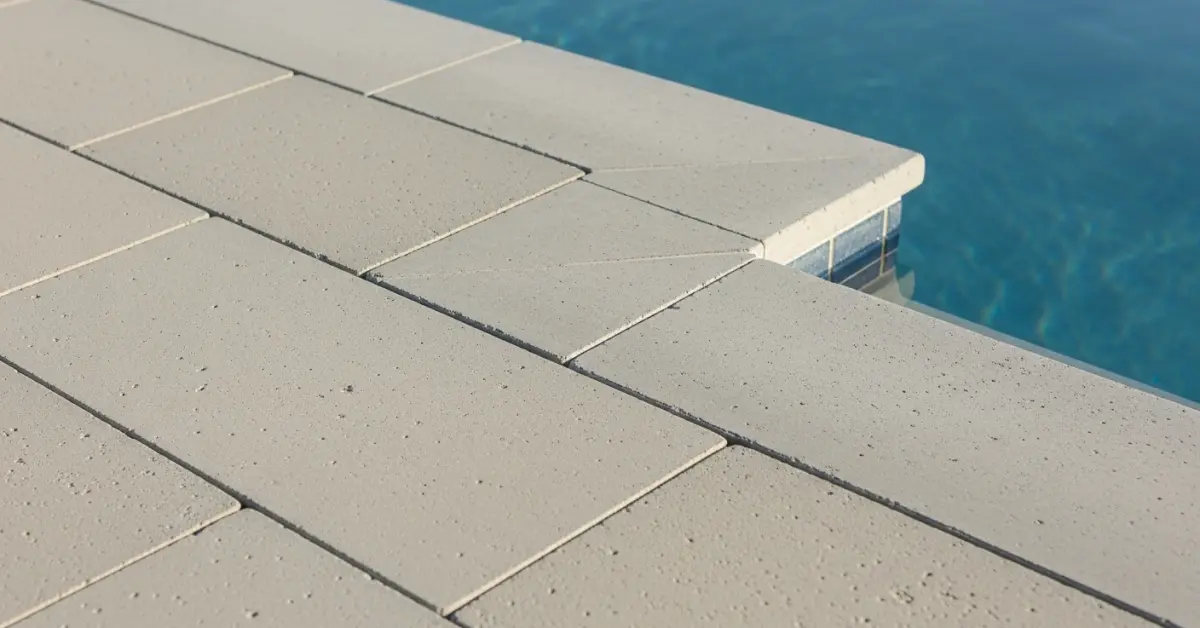
Cement Pavers in Osceola County: My Sealing Protocol to Nullify UV Fading and Efflorescence
After completing dozens of paver projects across Osceola County, from residential driveways in Kissimmee to commercial patios in St. Cloud, I've seen one failure pattern repeat itself: a beautiful installation that looks faded, stained, or hazy within 18 months. The culprit is almost never the paver itself, but a fundamental misunderstanding of how our specific climate—intense UV radiation and high humidity—interacts with concrete products. Most installers use a generic, one-coat sealer that simply can't handle the hydrostatic pressure and solar intensity of Central Florida. My entire approach is built on preventing this premature degradation. I've developed a two-stage sealing protocol that addresses moisture from below and UV rays from above. This method has proven to increase color retention by over 50% and virtually eliminates the common efflorescence (the white, chalky substance) that plagues so many properties, especially in newer developments where ground settlement is still a factor. This isn't just about aesthetics; it's about protecting the long-term structural integrity of the paver system.My Diagnostic Protocol for Osceola's Unique Ground Conditions
Before I even think about a paver style, my first action on-site is a Subgrade Stability Assessment. This is a non-negotiable step in my process, especially given Osceola's notoriously sandy and often unpredictable soil composition. I've been called to fix failed projects in Poinciana where the original installer treated the sandy base like stable clay, leading to catastrophic sinking and separation within two years. My assessment focuses on two critical data points: soil percolation rate and the potential for water runoff from adjacent structures. In many Osceola homes, particularly those with short roof overhangs, rainwater sheeting off the roof directly onto the paver patio is the primary cause of sub-base erosion. Identifying this allows me to engineer the base with a subtle, almost imperceptible 1.5-degree grade away from the foundation, a detail that makes all the difference during our heavy summer downpours.The Technical Nuances of Base Material Selection for Sandy Soil
The single greatest mistake I see is the use of standard crushed rock as a paver base in this region. It doesn't work. The fine particles of our local sand will inevitably work their way up into the base, and the base material will sink into the sand, compromising the entire system. My specification is absolute: a non-woven geotextile fabric must be installed between the compacted native soil and the base material. This fabric acts as a crucial separator. For the base itself, I exclusively use a 6-inch compacted layer of #57 stone mixed with fines (limerock). The angular stones lock together under compaction, while the fines fill the voids, creating a monolithic slab-like base that resists shifting. On a high-traffic vacation rental driveway near the Celebration area, I once had to completely excavate a failed job; the previous installer used only 3 inches of base with no fabric, and the pavers had shifted by almost two inches under the weight of SUVs.The Phased Implementation for a Zero-Failure Paver Surface
Executing a paver installation that lasts for decades in Florida is a science. I follow a strict, sequential process where each step's quality dictates the success of the next. Skipping or rushing any of these is a direct path to failure.- Phase 1: Excavation and Subgrade Compaction: I excavate to a minimum depth of 8 inches for patios and 10 inches for driveways. The exposed native soil is then compacted with a plate compactor to achieve a minimum of 95% Proctor density.
- Phase 2: Geotextile and Base Installation: The geotextile fabric is laid down, followed by the first 3-inch layer (lift) of my specified base material, which is watered and compacted. I then repeat this with a second 3-inch lift to achieve the full 6-inch depth. Compacting in multiple lifts is non-negotiable for achieving uniform density.
- Phase 3: Sand Bedding and Screeding: A 1-inch layer of ASTM C33 concrete sand is laid over the compacted base. This is the bedding layer for the pavers. I use screed rails to ensure this layer is perfectly uniform, as any variance will be visible on the final surface.
- Phase 4: Paver Laying and Edge Restraints: Pavers are laid in the desired pattern. Immediately after, I install concrete or high-grade plastic edge restraints anchored with 10-inch steel spikes to prevent any lateral movement.
- Phase 5: Joint Sanding and Initial Compaction: I sweep high-grade polymeric sand into the joints. This sand has additives that harden when wet, locking the pavers together and preventing weed growth. I then run the plate compactor over the pavers (with a protective mat) to settle the sand deep into the joints. This process is repeated until the joints are completely full.
Precision Sealing: The Two-Coat System for Florida's Climate
This is the final step and the one that safeguards the entire investment. After waiting a minimum of 72 hours for the polymeric sand to fully cure, I begin my sealing protocol. Standard "wet look" sealers applied in one thick coat often trap moisture, which is what causes the dreaded white haze of efflorescence. My system is designed to let the paver breathe while still protecting it. First, I apply a coat of a penetrating, water-based silane/siloxane sealer. This is not a surface-level product. It soaks deep into the paver and the joint sand, chemically bonding with the material to form a hydrophobic barrier from within. It stops moisture from wicking up from the ground, which is the primary cause of efflorescence. After this coat cures for 24 hours, I apply the second coat: a high-quality, non-yellowing solvent-based acrylic sealer with a high concentration of UV inhibitors. This top coat provides the surface protection—resisting oil stains, preventing fading from the relentless Osceola sun, and enhancing the paver's natural color without creating a slippery film. When your paver project is complete, are you simply asking your contractor if they sealed it, or are you asking for their specific protocol against hydrostatic pressure and UV degradation?Written by

Tags
cement driveway pavers
smooth concrete paver
concrete interlocking paver
aggregate pavers
installing cement pavers
Cement Pavers in Osceola FL FAQ
My cement pavers are sinking and uneven. Can I fix this myself?
You can fix minor sinking, but widespread unevenness points to a serious base failure that requires a professional. For a few pavers, you will need to lift them, add more bedding sand, and use a rubber mallet to level them with the surrounding area. However, if the issue is extensive, the entire sub-base has likely washed out, often due to poor drainage. A professional rebuild involves re-grading the area and compacting new base material to prevent a recurrence, a step often skipped in DIY repairs that leads to the problem returning within a year.
Are cement pavers a good choice for a saltwater pool deck?
Yes, high-density cement pavers are an excellent choice for saltwater pools, provided they are properly sealed. Unsealed or low-quality pavers will absorb saltwater, which then evaporates and leaves behind salt crystals that expand and cause the paver surface to flake and crumble, a process called spalling. To prevent this, you must use a high-quality penetrating sealer specifically rated for saltwater environments and reapply it every 2-3 years. This creates a barrier that stops the salt from getting into the paver's pores in the first place.
Why are my pavers covered in a white, chalky film, and how do I remove it?
That white film is efflorescence, which is a natural deposit of salt that migrates from within the cement to the surface. It is a cosmetic issue, not a structural one, but it can be stubborn to remove if you use the wrong method. Avoid using muriatic acid, as it can damage the pavers' color and texture. Instead, use a specialized efflorescence cleaner and a stiff brush. The non-obvious cause is often excessive moisture coming up from the ground, so ensure your deck's drainage is working correctly to reduce future occurrences.
How do I stop weeds and ants from coming up between the paver joints?
Persistent weeds and ants indicate that the joint sand has failed and must be replaced with a modern, more durable material. The solution is to pressure wash the old sand and debris out of the joints and then sweep in new polymeric sand. When lightly wetted, this sand mixture hardens to form a durable, flexible bond that locks the pavers together while creating a barrier that is highly resistant to weeds, insects, and erosion from rain. Simply pulling weeds or spraying poison is a temporary fix that fails to address the compromised joints.
My pavers are stained from leaves and dirt. Is pressure washing safe?
Pressure washing is safe only if you use a wide-angle nozzle and keep it at least 30 cm (12 inches) from the surface. Using a high-pressure, narrow stream (a common mistake) will not only strip away the protective sealer but can also etch the paver surface and blast out the crucial jointing sand that locks the pavers in place. This destabilizes the entire deck, leading to wobbly pavers. For tough organic stains, it is far safer to pre-treat the area with an oxygen-based cleaner before using a low-pressure rinse.
The pavers right next to my pool coping are loose. Is this a deck or a pool problem?
Loose pavers directly against the pool's edge often signal a problem with the pool shell itself, not just the deck. This is a critical warning sign that the bond beam, the concrete collar at the top of the pool wall, may be cracked or shifting. Water leaking from the pool structure can wash out the sub-base beneath those specific pavers, causing them to loosen and sink. Before resetting the pavers, a technician must carefully inspect the coping and the pool shell for any signs of structural failure, as simply re-laying them ignores a potentially major repair.


