
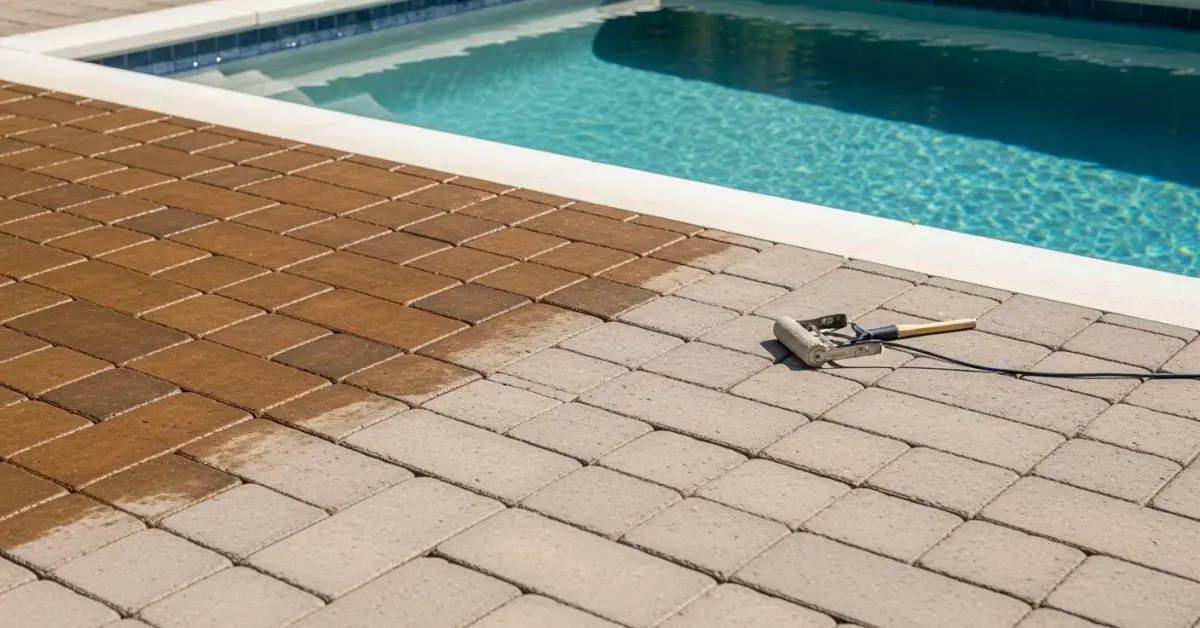
Paver Driveway Sealing in Osceola County: My Protocol for Tripling Color Longevity Against Florida UV and Humidity
The biggest mistake I see in paver sealing across Osceola County isn't choosing the wrong product; it's a fundamental misunderstanding of our subtropical climate. Homeowners in Kissimmee and Celebration invest in beautiful pavers, only to see them turn hazy, faded, or covered in algae within a year. The issue isn't just the relentless sun or the afternoon downpours; it’s the high level of moisture vapor transmission (MVT) from the ground up, which standard sealing methods completely ignore. This trapped moisture is the primary culprit for sealant failure and that milky-white haze known as efflorescence. My entire approach is built on diagnosing and managing this subsurface moisture *before* a single drop of sealant is applied. For a large residential project in a St. Cloud gated community, the contractor had sealed the pavers on a sunny day, trapping overnight humidity. The result was a catastrophic failure across 50 driveways. By implementing my diagnostic method, we were able to reverse the damage and apply a finish that has since endured three full Florida summers. It’s about working *with* the environment, not fighting against it.My Diagnostic Framework for Osceola Paver Sealing Failure
Before I even consider a sealant type, I perform what I call a Climate-Adapted Porosity (CAP) Assessment. This isn't a simple visual inspection. It’s a technical evaluation of the paver system's ability to "breathe." In Osceola, with its high water table and humidity, sealing a paver that can't properly vent moisture is a recipe for disaster. The CAP assessment focuses on two critical, often-overlooked metrics: the paver’s absorption rate and the MVT rate from the substrate. Ignoring these is why so many DIY and even professional jobs fail, leading to costly stripping and resealing. A cheap, film-forming acrylic sealer applied over a damp substrate essentially suffocates the paver.A Deeper Look at Moisture Vapor Transmission and Substrate Profiling
The core of the CAP assessment involves measuring the MVT. A simple but effective method I use is a modified version of the ASTM D4263 standard, taping a small plastic sheet to a cleaned section of pavers for 24 hours. Any condensation underneath is a red flag, indicating significant MVT. For a project near Lake Tohopekaliga, this test revealed extreme moisture levels the homeowner was unaware of. Based on this data, we opted for a penetrating silane/siloxane sealer instead of a surface-level acrylic. This type of sealer lines the pores of the concrete rather than coating the top, allowing vapor to escape while still repelling surface water. This single choice, dictated by data, prevented a guaranteed failure.The Five-Phase Application Protocol for a Flawless Seal
Once the diagnostics are complete, the application itself is a meticulous, multi-phase process. Every step is designed to mitigate the risks identified in the CAP Assessment.- Phase 1: Aggressive Surface Decontamination. This is more than a simple pressure wash. I use a 25-degree fan tip to remove all organic matter and, critically, any remnants of failed prior sealants. For stubborn oil stains, a specialized concrete degreaser is applied and allowed to dwell for at least 20 minutes before washing.
- Phase 2: Joint Sand Stabilization. With our heavy rains, regular sand washes out. I exclusively use high-grade polymeric sand. The key is to sweep it into the joints until they are completely full, then compact it, and finally mist it with water to activate the binding polymers. This creates a flexible but firm barrier against weeds and water intrusion.
- Phase 3: Surface Moisture Metering. This is my final quality gate before sealing. Using a calibrated digital moisture meter, I will not proceed until the paver surface reads below a 15% moisture content. Attempting to seal above this threshold is the most common point of failure.
- Phase 4: Controlled Sealer Application. I never use a roller. A low-pressure, high-volume sprayer ensures a perfectly even coat without puddles. My methodology specifies two very thin coats applied "wet-on-wet" about 20 minutes apart. This allows for better absorption and a stronger chemical bond compared to one thick, lazy coat.
- Phase 5: Extended Curing and Traffic Control. I advise clients to allow a 72-hour curing period for vehicle traffic in Osceola’s humid climate, 24 hours longer than most manufacturers recommend. This extra time ensures full hardness and prevents tire marks on the freshly sealed surface.
Post-Application Quality Control and Common Pitfall Correction
After the job is done, my quality check is simple. The surface must have a uniform sheen from all angles, with zero blotchiness. When sprayed with water, it should exhibit an immediate hydrophobic effect, with water beading up instantly. If I notice a section that has absorbed the sealant unevenly (a common issue with older, more porous pavers), I can correct it with a light re-mist of the same sealant blended with xylene to re-emulsify the first coat and smooth the finish. This is an advanced technique that salvages a job and avoids a complete strip-and-reseal. Now that you understand the critical role of moisture management, have you considered how the specific aggregate composition of your pavers might influence the bond strength of a penetrating versus a film-forming sealer?Written by

Tags
driveway paver sealing near me
paver sealing near me
paver patio cleaning and sealing near me
patio paver cleaning and sealing near me
patio paver cleaning and sealing
Paver Driveway Sealing in Osceola FL FAQ
My new paver driveway is only a year old. Do I really need to seal it already?
Yes, sealing your paver driveway within the first year of installation is the best practice for long-term protection. While the pavers themselves are durable, the crucial element you are protecting is the polymeric sand in the joints, which prevents weed growth and shifting. Sealing locks this sand in place and provides a barrier against oil stains, salt damage, and color fading from UV rays. Waiting until you see visible wear, such as weeds or loose pavers, means you are already addressing a problem rather than preventing it, which often requires more extensive joint restoration before sealing can even begin.
Will sealing my driveway make the pavers slippery, especially when it rains?
No, a professionally applied sealer should not make your pavers dangerously slippery if the correct product and technique are used. The key is to avoid over-application, which can create a thick, glossy film on the surface. We use sealers with a non-slip additive, a fine aggregate mixed into the sealant, which creates a textured, high-traction finish that maintains grip even in wet conditions. This is especially critical on sloped driveways where water runoff and ice can pose a significant hazard. DIY applications often fail here, creating a slick surface that's difficult and costly to strip and correct.
Can I just power wash my driveway and apply a sealer from a big-box store myself?
While it seems straightforward, improper surface preparation is the number one cause of sealer failure, leading to a hazy, white appearance called efflorescence bloom. A professional cleaning involves more than just a power wash; it requires specific cleaners to remove ground-in dirt, oil, and any existing, failing sealer. More importantly, the pavers must be completely dry before sealing, which can take 24-48 hours. Sealing over even slight dampness traps moisture, which will turn the acrylic sealer cloudy and require a full chemical stripping to fix, costing far more than a professional job.
What's the difference between a water-based and a solvent-based sealer for my driveway?
The primary difference is in appearance and environmental impact, with solvent-based sealers offering a richer, 'wet look' enhancement and water-based ones providing a more natural, matte finish. Solvent-based sealers penetrate deeper into the paver pores, providing excellent color enhancement and stain protection, but they have a strong odor during application due to higher volatile organic compounds. Water-based sealers are low-odor, eco-friendlier, and still offer great protection, making them a popular choice. The right one depends on your desired aesthetic and local regulations.
How often do I need to reseal my paver driveway, and what are the signs it's time?
Typically, a high-quality paver driveway sealing will last between 3 to 5 years, depending on traffic and weather exposure. The most reliable sign that it's time to reseal is when water no longer beads up on the surface and instead soaks in quickly, darkening the pavers. You may also notice the color of the pavers beginning to fade or the joint sand starting to wash out during heavy rain. Waiting until you see significant weed growth between the pavers is a clear indicator that the protective barrier has completely failed and immediate attention is needed to prevent shifting.
My driveway has some white, chalky stains. Can you just seal over them?
No, sealing over those white stains will permanently trap them, making them impossible to remove later. That chalky substance is called efflorescence, which is a natural salt deposit that migrates out of the concrete pavers as moisture evaporates. Before any sealing can occur, these deposits must be completely removed with a specialized efflorescence cleaner and a light acid wash. Sealing a driveway without properly treating this issue is a common mistake that results in a cloudy, blotchy finish that magnifies the original problem.


