
Osceola County Paver Patio Repair: My Protocol for a 30% Longer Lifespan in Florida's Sandy Soil
After years of exclusively repairing paver patios here in Osceola County, from the master-planned communities in Celebration to the sprawling backyards in St. Cloud, I've seen one issue derail more projects than any other: sub-base failure. The common advice to simply "level the pavers" is a temporary patch at best. My approach addresses the root cause—the unique interaction between our sandy soil and intense rainfall—to deliver a repair that actually lasts. The problem isn't just a few sunken pavers; it's a systemic failure starting from the ground up. I developed my diagnostic protocol after a particularly challenging project on a pool deck in Kissimmee where the homeowner had paid for three "repairs" in five years. The issue was never the pavers themselves, but a base that was essentially turning to soup with every summer storm. My methodology focuses on stabilizing this foundation to prevent the cycle of sinking, shifting, and weed growth for good.The "Soil Liquefaction" Diagnostic: Why Osceola Patios Systematically Fail
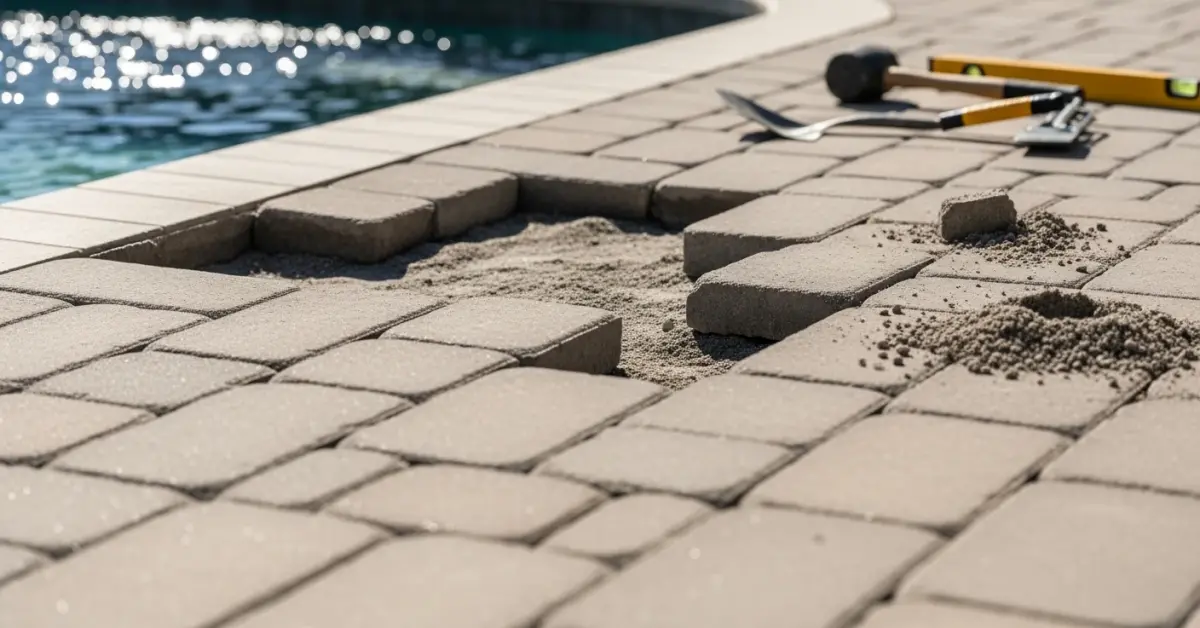
Most contractors see a sunken paver and reach for more sand. I see evidence of what I call "soil liquefaction failure." This isn't a dramatic geological event, but a slow-motion process specific to our local conditions. The fine, sugar-like sand that makes up most of Osceola County's subsoil doesn't compact like denser earth. When our heavy subtropical rains hit, water saturates the paver joints, penetrates the bedding sand, and washes out fine particles from the aggregate base, creating voids. The patio then settles into these new hollows. I first codified this pattern on a large driveway project in Poinciana. The edge pavers were collapsing, and the center was developing a significant dip. The original installer used a standard 4-inch aggregate base, which would be sufficient in many regions. Here, however, it was completely inadequate. The fine subsoil had infiltrated the aggregate, compromising its load-bearing capacity. This is where generic internet advice fails Osceola homeowners. The solution isn't more aggregate; it's isolating the aggregate from the subsoil.Mastering the Base: Geotextile Integration and Compaction in Lifts
To permanently solve this, my entire repair process is built around the base layer. Simply topping off the existing base is a critical error I see all the time. A true repair requires a full excavation of the affected area to implement a proper foundation.- Geotextile Fabric: This is the single most important component for longevity in Florida's sandy soil. I use a non-woven geotextile fabric placed directly on the compacted native subsoil. This fabric acts as a separator, preventing the fine sand from migrating upwards into the crushed stone base while still allowing for proper drainage. It's a non-negotiable step in my process.
- Base Aggregate Specification: I use a #57 clean crushed stone for the base. The crucial detail is not just the depth, but the compaction method. The base must be compacted in 2-3 inch lifts using a plate compactor. Compacting a full 6-inch layer at once only densifies the top surface, leaving the bottom loose and susceptible to future settlement.
- Bedding Sand (ASTM C33): The 1-inch layer of bedding sand is for fine-tuning, not for correcting base-level errors. I use clean, sharp-angled concrete sand (ASTM C33). I've found that ensuring it's slightly damp during the screeding process allows for a firmer, more stable setting bed before laying the pavers.
My 5-Step Paver Reset Protocol for a Permanent Fix
Repairing a paver patio correctly is a surgical process. Rushing any of these steps will compromise the final result. This is the exact methodology I apply to every project.- Systematic Paver Deconstruction: I carefully remove the pavers from the failed area, working from the outside in. I number the pavers on the back with a lumber crayon to ensure they can be reinstalled in their original pattern, preserving the patio's aesthetic.
- Full Base Excavation and Re-Grading: I excavate the old base material and subsoil to a depth of at least 7-8 inches. This is where I correct the core issue, ensuring the new sub-base has a proper slope (a minimum of 1/4 inch per foot) away from any structures.
- Geotextile and Aggregate Installation: I lay down the geotextile fabric, overlapping the seams by 12 inches. Then, I install the #57 stone base in 3-inch lifts, compacting each lift thoroughly with a plate compactor until the tool begins to bounce.
- Screeding and Paver Reinstallation: I lay down 1-inch screed pipes and pull the ASTM C33 sand to create a perfectly smooth setting bed. I then reinstall the numbered pavers, using a rubber mallet to set them and maintaining tight joint lines.
- Edge Restraint, Joint Sanding, and Final Compaction: I verify the integrity of the edge restraints, as their failure is a common cause of paver creep. Finally, I sweep high-quality polymeric sand into the joints. This is critical for our rainy climate as it hardens to resist weeds and washout. The final pass with the plate compactor locks everything together.
Post-Repair QA: Achieving ICPI Surface Tolerance and Joint Lock-Up
A repair isn't complete until it passes my quality assurance checks. My standard is to meet or exceed the Interlocking Concrete Pavement Institute (ICPI) guidelines. This means there should be no more than a 1/8-inch deviation in surface elevation when measured with a 10-foot straightedge. This ensures a smooth, trip-free surface. The final, crucial step is the activation of the polymeric sand. I use a specific "shower-rinse-shower" technique with the hose nozzle to saturate the sand without washing it out of the joints, a common mistake that leads to a permanent haze on the paver surface. The high humidity in Osceola County can affect curing time, so I always advise clients to stay off the surface for a full 48 hours to achieve a perfect, rock-solid joint lock-up. Given that many Osceola County patios and pool decks are interconnected, have you considered how the hydrostatic pressure and chlorinated water overflow from your pool might be accelerating the degradation of your patio's jointing sand and sub-base?Written by

Tags
paving stone repair
fix pavers
brick paver patio repair near me
paver repair near me
paver installation and repair
Paver Patio Repair in Osceola FL FAQ
Why are my pavers sinking in one spot? Is it just a simple fix?
Sinking pavers are almost always caused by a failure of the compacted base underneath, not the pavers themselves. While topping it off with sand is a tempting quick fix, this is a temporary solution that will sink again within a year as the underlying issue—poor water drainage or base compaction—remains unaddressed. A proper repair involves removing the pavers in the affected area, excavating the old base material, and rebuilding it with at least 4-6 inches of new, properly compacted aggregate base before reinstalling the pavers. This ensures water drains correctly and prevents the same spot from failing again.
Can I just power wash the weeds and old sand out and add new sand myself?
You can, but improper technique often creates bigger problems down the road. Power washing can easily dislodge the crucial leveling sand bed directly beneath the pavers, causing them to shift and become uneven over time. Furthermore, if you are using polymeric sand, applying too much water during activation or leaving a haze on the paver surface can cause it to fail prematurely or permanently stain your patio. Professional application ensures the correct water volume and a clean sweep, hardening the joints correctly to lock pavers and resist weeds for its full 3-5 year lifespan.
What's the white haze on my pavers, and how do I get rid of it?
That white haze is likely efflorescence, which is a natural deposit of mineral salts left behind as water evaporates from within the paver. While it is not structurally harmful, it can be an eyesore. It often appears on newer installations and may fade on its own, but persistent cases can be treated with specialized cleaners designed to dissolve the salts without damaging the paver's color or texture. Avoid using muriatic acid, as an incorrect dilution can permanently etch the surface and alter the color of your pavers, a mistake that is irreversible.
My pavers are rocking and uneven. How dangerous is this?
Uneven pavers that rock underfoot are a significant trip-and-fall hazard, creating a serious liability risk for you as a homeowner. This instability, known as paver creep, is often caused by a failing edge restraint—the plastic or concrete border that is supposed to hold the entire paver field under compression. When the edge fails, the pavers at the perimeter shift, which has a domino effect causing looseness across the patio. The fix requires reinstalling or upgrading the edge restraint and re-compacting the pavers to lock them back into a tight, stable grid.
Some of my pavers are cracked. Do I need to replace the whole patio?
No, you do not need to replace the entire patio for a few cracked pavers. One of the primary advantages of a paver system is the ability to perform spot repairs by replacing individual units. A technician can carefully extract the damaged pavers using specialized tools that avoid disturbing the surrounding area. The challenge, however, is finding a perfect color match, as pavers from a new batch may differ slightly due to production variations and weathering. It is a good practice to always keep 10-15 attic stock pavers from the original installation for this exact purpose.
There are ant hills all over my patio joints. Is this just a pest problem?
Ants are not just a nuisance; they are a clear indicator of structural failure in your patio's jointing system. When ants can build mounds, it means the jointing sand has washed away or degraded, creating voids that allow them to excavate the crucial leveling sand from beneath your pavers. This process, called undermining, will inevitably lead to pavers sinking and becoming unstable. Simply spraying for ants is a temporary fix; the permanent solution is to clean out the joints and refill them with high-quality polymeric sand, which hardens to create a barrier that pests cannot penetrate.


