
Paver Patio Repair in Pinellas County: My Protocol to Prevent Chronic Sub-grade Failure
Most paver patio repairs in Pinellas County are doomed to fail within two years, and I see it happen constantly from St. Pete to Palm Harbor. The common approach is to lift the sunken pavers, throw some more sand underneath, and call it a day. This is merely a cosmetic fix that ignores the root cause: sub-grade failure driven by our unique local conditions—intensely sandy soil and torrential summer downpours. My entire repair philosophy is built on correcting this foundational flaw. I don't just level pavers; I re-engineer the base and sub-base to handle the hydrostatic pressure and soil composition specific to our coastal environment. A properly repaired patio, even on a waterfront property in Clearwater Beach, should not require another leveling service for a decade or more. This is achieved by focusing on soil compaction and water management, not just the surface pavers.The Sub-Base Stress Test: My Diagnostic Framework for Pinellas County Patios
Before I even think about lifting a single paver, I perform a diagnostic I developed after seeing a large-scale commercial project in the Gateway area fail repeatedly. My analysis focuses on three critical vectors: soil composition, water runoff patterns, and edge restraint integrity. The biggest mistake I see is contractors treating all base issues identically. The sandy soil behind a bungalow in Kenwood behaves entirely differently than the saturated ground of a home on the Intracoastal in Indian Rocks Beach. My process involves taking core samples of the existing base to identify contamination—where the native Florida sand has migrated up into the aggregate layer, compromising its structural integrity. This is the primary failure point.Analyzing Compaction Ratios and Geotextile Fabric Integration
Here's the technical detail that separates a temporary fix from a permanent solution. The goal is to create a new sub-base that achieves a minimum of a 95% Standard Proctor Density. This is a non-negotiable metric for me. To achieve this in Pinellas County's loose soil, the secret is not more gravel, but the correct application of a separation layer. I exclusively use a non-woven geotextile fabric between the native soil and the new aggregate base. This fabric acts as a barrier, preventing the fine sand from migrating upwards during heavy rain events and compromising the base. Furthermore, the type of polymeric sand used for the joints is critical. Given our high humidity and intense UV exposure, I use a formula with advanced polymers that prevent washout and inhibit weed growth for at least 3-5 years, a significant increase over standard-grade sand.The Re-Engineering Process: A Step-by-Step Breakdown
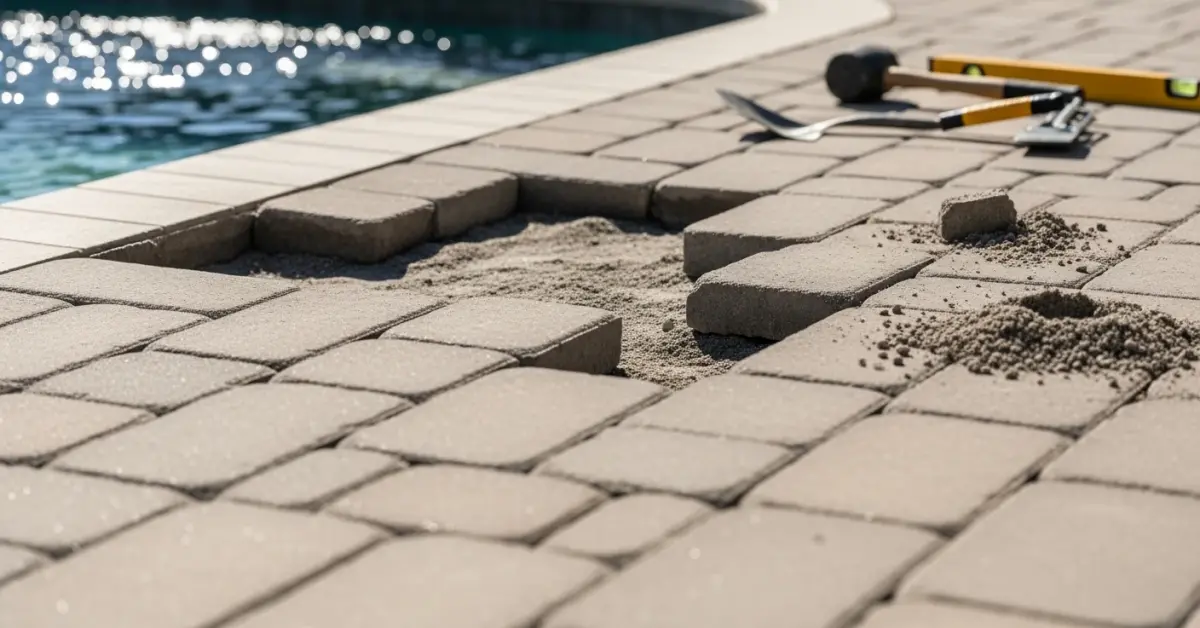
Once the diagnosis is complete, the execution has to be flawless. Over the years, I've refined my process into a sequence that guarantees stability and longevity. My methodology is not the fastest, but it's the one that prevents callbacks.- Paver Extraction & Cataloging: I carefully remove the pavers in the affected area, marking their orientation to ensure the original pattern is perfectly replicated.
- Sub-Base Excavation: I excavate the old, contaminated base material completely. This usually means digging down 6 to 8 inches below the paver height.
- Geotextile Fabric Installation: The geotextile fabric is laid down, overlapping seams by at least 12 inches to ensure a continuous separation barrier.
- New Aggregate Base Installation: I install a new base of crushed limestone aggregate in 2-inch lifts. Each lift is individually moistened and compacted with a plate compactor.
- Screeding the Setting Bed: A 1-inch layer of ASTM C33 concrete sand is screeded perfectly level to provide the final setting bed for the pavers.
- Paver Re-installation & Leveling: The original pavers are re-laid, and fine adjustments are made with a rubber mallet to ensure a perfectly even surface.
- Edge Restraint Fortification: I inspect and reinforce all surrounding edge restraints. A failed edge restraint is a common, and often overlooked, cause of paver shifting.
- Polymeric Sand Application: The joints are filled with high-grade polymeric sand, the surface is compacted one final time to lock the pavers in, and the sand is activated with a fine mist of water according to manufacturer specifications.
Achieving Zero-Lip and Proper Joint Stabilization
The final phase is all about precision. My quality standard is a "zero-lip" finish, meaning you cannot feel any height difference when sliding your foot across paver seams. This is achieved during the re-installation and final compaction stages. The joint stabilization is equally important. In our humid Pinellas climate, I insist on a 48-hour cure time with no foot traffic on the repaired area. This is 24 hours longer than most manufacturers recommend, but I’ve found it’s essential to allow the polymers in the sand to fully harden and create a truly rock-solid, semi-permeable joint that can withstand our weather. A final check with a 4-foot level confirms a minimum slope of 1/4 inch per foot, directing water away from any structures. Instead of asking how much it costs to level your pavers, shouldn't the first question be what is the soil's load-bearing capacity and how will the sub-base be engineered to exceed it?Written by

Tags
paving stone repair
fix pavers
brick paver patio repair near me
paver repair near me
paver installation and repair
Paver Patio Repair in Pinellas FL FAQ
Why are my pavers sinking in one spot? Is it just a simple fix?
Sinking pavers are almost always caused by a failure of the compacted base underneath, not the pavers themselves. While topping it off with sand is a tempting quick fix, this is a temporary solution that will sink again within a year as the underlying issue—poor water drainage or base compaction—remains unaddressed. A proper repair involves removing the pavers in the affected area, excavating the old base material, and rebuilding it with at least 4-6 inches of new, properly compacted aggregate base before reinstalling the pavers. This ensures water drains correctly and prevents the same spot from failing again.
Can I just power wash the weeds and old sand out and add new sand myself?
You can, but improper technique often creates bigger problems down the road. Power washing can easily dislodge the crucial leveling sand bed directly beneath the pavers, causing them to shift and become uneven over time. Furthermore, if you are using polymeric sand, applying too much water during activation or leaving a haze on the paver surface can cause it to fail prematurely or permanently stain your patio. Professional application ensures the correct water volume and a clean sweep, hardening the joints correctly to lock pavers and resist weeds for its full 3-5 year lifespan.
What's the white haze on my pavers, and how do I get rid of it?
That white haze is likely efflorescence, which is a natural deposit of mineral salts left behind as water evaporates from within the paver. While it is not structurally harmful, it can be an eyesore. It often appears on newer installations and may fade on its own, but persistent cases can be treated with specialized cleaners designed to dissolve the salts without damaging the paver's color or texture. Avoid using muriatic acid, as an incorrect dilution can permanently etch the surface and alter the color of your pavers, a mistake that is irreversible.
My pavers are rocking and uneven. How dangerous is this?
Uneven pavers that rock underfoot are a significant trip-and-fall hazard, creating a serious liability risk for you as a homeowner. This instability, known as paver creep, is often caused by a failing edge restraint—the plastic or concrete border that is supposed to hold the entire paver field under compression. When the edge fails, the pavers at the perimeter shift, which has a domino effect causing looseness across the patio. The fix requires reinstalling or upgrading the edge restraint and re-compacting the pavers to lock them back into a tight, stable grid.
Some of my pavers are cracked. Do I need to replace the whole patio?
No, you do not need to replace the entire patio for a few cracked pavers. One of the primary advantages of a paver system is the ability to perform spot repairs by replacing individual units. A technician can carefully extract the damaged pavers using specialized tools that avoid disturbing the surrounding area. The challenge, however, is finding a perfect color match, as pavers from a new batch may differ slightly due to production variations and weathering. It is a good practice to always keep 10-15 attic stock pavers from the original installation for this exact purpose.
There are ant hills all over my patio joints. Is this just a pest problem?
Ants are not just a nuisance; they are a clear indicator of structural failure in your patio's jointing system. When ants can build mounds, it means the jointing sand has washed away or degraded, creating voids that allow them to excavate the crucial leveling sand from beneath your pavers. This process, called undermining, will inevitably lead to pavers sinking and becoming unstable. Simply spraying for ants is a temporary fix; the permanent solution is to clean out the joints and refill them with high-quality polymeric sand, which hardens to create a barrier that pests cannot penetrate.


