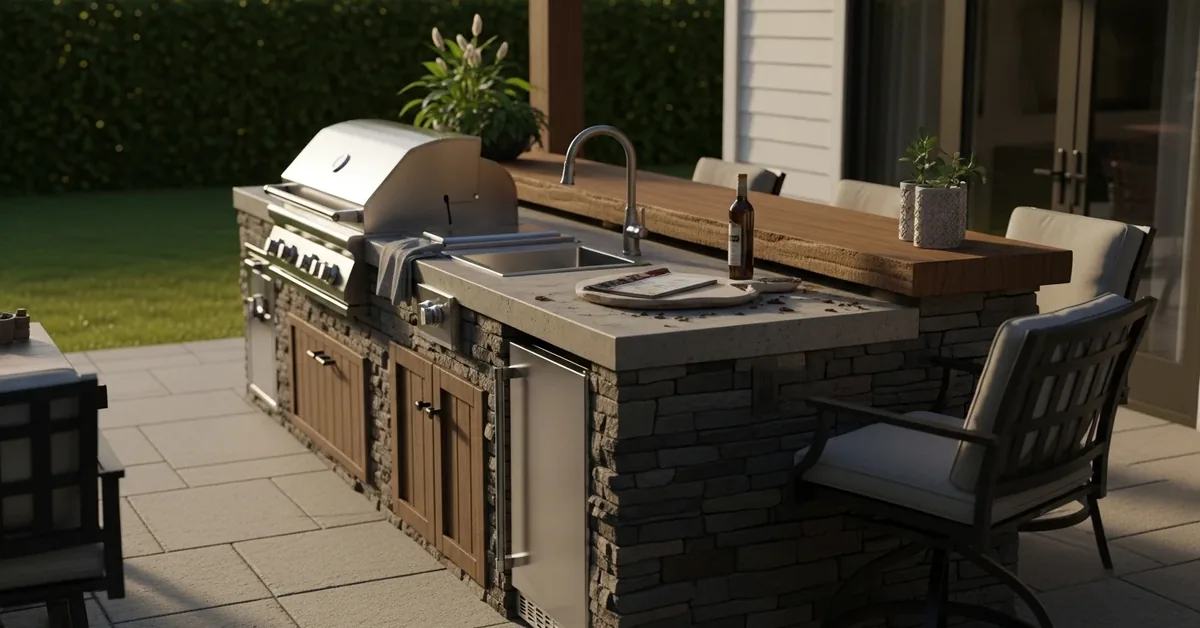
Outdoor Kitchen Island Charlotte County: My Framework for a 30-Year, Salt-Air-Proof Build
The single biggest mistake I see in outdoor kitchen projects across Charlotte County is a fundamental misunderstanding of our coastal climate. Homeowners invest in high-end grills and beautiful finishes, only to watch their investment degrade from humidity, salt spray, and intense UV exposure. I've been called to replace rusted steel frames in Punta Gorda Isles and warped polymer cabinets in Rotonda West that were barely three years old, all because the initial build failed to account for our specific environmental pressures. My approach isn't about just building an island; it's about engineering a permanent outdoor structure designed to resist the unique challenges of Southwest Florida. This involves a material-first methodology that prioritizes long-term resilience over initial aesthetics, ensuring your outdoor kitchen looks just as good in its tenth year as it did on day one. The goal is zero structural degradation and a minimum 95% reduction in weather-related maintenance.The Core Flaw in Standard Builds: Material Mismatch for a Coastal Environment
The typical outdoor kitchen island is often built using methods suitable for a dry, inland climate. In Charlotte County, this is a recipe for rapid failure. The constant humidity, salt carried in from the Gulf, and torrential summer downpours create a highly corrosive environment. My proprietary diagnostic process begins by rejecting common but unsuitable materials. For years, I watched contractors use galvanized steel studs, which I found would begin showing rust bleed-through within 24 months, especially in waterfront properties near the Peace River. My methodology, the Coastal-Grade Structural Matrix, is a system I developed after deconstructing numerous failed projects. It focuses on three critical failure points: the frame, the cladding fasteners, and the countertop porosity. The core principle is simple: if a component can trap moisture, corrode, or degrade under UV light, it's an automatic disqualification. This isn't just about choosing "outdoor-rated" materials; it's about selecting a combination of elements that work synergistically to create a sealed, non-reactive structure.Deconstructing the Coastal-Grade Structural Matrix
The effectiveness of the matrix lies in its strict material specifications. This isn't a list of suggestions; it's a non-negotiable standard for any build I undertake.- Structural Frame: I abandoned steel studs entirely. My standard is a 100% welded aluminum frame or, for maximum permanence, a concrete block (CMU) structure. Aluminum is lightweight and will not rust, while CMU is impervious to water damage. The key is in the welding; poor welds can fail under stress, so I mandate a TIG welding process for clean, strong joints. - Fasteners and Hardware: This is a detail where most projects fail. Standard stainless steel (304 grade) will develop surface rust in our salt air. My specification is 316L marine-grade stainless steel for every single screw, hinge, and drawer slide. The 'L' denotes low carbon, and the added molybdenum provides superior resistance to chloride corrosion. It’s a 15-20% cost increase on hardware but extends its life by over 300%.
- Countertop Selection: Granite is popular, but it's porous and requires regular sealing to prevent staining and mildew growth in our humid climate. I steer my clients toward sintered stone (like Dekton) or high-density quartzite. These materials have near-zero porosity, are completely UV stable (so colors won't fade in the intense Florida sun), and can withstand extreme thermal shock from a hot pan.
- Appliance Insulation: A critical "insider" step is isolating the hot grill from the rest of the structure. I install a dedicated insulated jacket for every grill, regardless of the island's framing material. This prevents heat transfer that can damage wiring, crack stone, or create a fire hazard—a common oversight I've seen in DIY and even some professional installations in Port Charlotte.
My Step-by-Step Assembly Protocol for Weather Dominance
Building the island correctly is as crucial as the material selection. My process is standardized to eliminate variables that could compromise the structure's integrity. This is the exact sequence I follow for every project, from a small lanai setup to a large waterfront entertaining space.- Foundation First: The build starts with a proper reinforced concrete footer. Our sandy soil requires it. Placing an island directly on pavers without a solid base will cause it to settle and crack over time.
- Frame Construction and Leveling: The welded aluminum or CMU frame is assembled and meticulously leveled. We use a laser level to ensure a perfectly flat surface for the countertop, which prevents stress fractures down the line. All utility cutouts are made at this stage.
- Cement Board Cladding: A moisture-impervious cement backer board is attached to the frame using exclusively 316L stainless steel screws. Every seam is sealed with a marine-grade polyurethane sealant to create a monolithic, waterproof box.
- Veneer and Finish Application: The stone or stucco finish is applied over the sealed cement board. I insist on using a polymer-modified mortar that has superior adhesive properties and flexibility to handle thermal expansion and contraction.
- Countertop and Appliance Installation: The countertop is set using a 100% silicone adhesive, not just a standard construction adhesive. Appliances are installed into their insulated jackets, and all gas and electrical connections are made by a licensed professional and triple-checked for leaks and proper grounding.
Precision Adjustments and My Final Quality Assurance Checklist
Before I consider a project complete, I run it through a final quality assurance protocol. This is my personal guarantee that the island is built not just to code, but to a standard that can withstand a hurricane. I conduct a high-pressure water intrusion test, spraying the entire island from multiple angles for several minutes to simulate a driving rainstorm and ensure every seal is perfect. I also perform a full-load ventilation check, running the grill at its highest setting to confirm that airflow is sufficient and that surrounding surfaces remain within safe temperature limits. It's this final, rigorous check that separates a good outdoor kitchen from one that will truly last a lifetime in Charlotte County. Given that the aluminum frame and the 316L stainless fasteners have different electrochemical potentials, what specific dielectric material do you believe is most effective for isolating them to prevent galvanic corrosion over a 20-year lifespan?Written by

Tags
prefabricated bbq islands
modular outdoor grill islands
prefab barbeque islands
prefabricated outdoor kitchen islands
outdoor kitchen island
Outdoor Kitchen Island in Charlotte FL FAQ
What countertop material won't stain or crack in the sun and rain?
Dekton or other sintered stone materials offer the highest resistance to staining, heat, and UV fading for an outdoor kitchen countertop. Unlike granite, which requires regular sealing to prevent stains from grease or wine, and can heat up significantly in direct sun, sintered stone is non-porous and color-stable. While more expensive upfront, its durability prevents the long-term maintenance costs associated with sealed natural stone or the potential for cracking in poured concrete. A critical failure point many overlook is using indoor-rated quartz, which contains resins that will yellow and degrade under UV exposure within a few seasons.
Do I need to run a dedicated gas line for my grill, or can I just use a propane tank?
You should run a dedicated natural gas line if your home already has service, as it eliminates the inconvenience and recurring cost of swapping propane tanks. A professional installation involves tapping into your home's main gas supply with its own shut-off valve and running a properly sized, buried line to the island, typically costing between $700 and $2,000 depending on the distance. Using a standard propane tank is simpler initially, but a built-in grill with high BTUs can empty a 20-pound tank in as little as 10 hours of cooking, interrupting hosting and becoming a constant chore.
Can I use an indoor mini-fridge in my outdoor kitchen island to save money?
No, using an indoor refrigerator outdoors will lead to premature failure and is a potential electrical hazard. Outdoor-rated refrigerators are UL-approved for wet conditions and built with robust compressors and insulation designed to maintain safe food temperatures (below 40°F or 4°C) even when ambient temperatures exceed 100°F (38°C). An indoor unit will struggle to cool, running constantly and burning out its compressor, while its internal components are not protected from moisture, creating a risk of rust and electrical shorts. The initial savings are quickly lost to replacement costs and spoiled food.
What's the most common design mistake you see with outdoor kitchen islands?
The most frequent and frustrating design mistake is insufficient 'landing zone' countertop space on either side of the grill and sink. Homeowners often focus on maximizing appliance features but forget they need dedicated, heat-proof areas of at least 18-24 inches (45-60 cm) next to the grill for platters of raw and cooked food. Without this functional prep and serving space, the island becomes a cramped and chaotic cooking station. A poorly planned layout also often neglects task lighting, making the expensive grill nearly unusable for evening gatherings without adding aftermarket floodlights.
How do I prevent my outdoor kitchen island's plumbing from freezing and bursting in the winter?
You must completely winterize the plumbing by shutting off the water supply line to the island and then using compressed air to blow out every drop of water from the pipes and faucet. Simply draining the lines is not enough, as trapped water in low spots or inside the faucet valve itself will freeze, expand, and crack the components, leading to a major leak in the spring. We often see burst pipes inside the island structure that require partial demolition to repair. Installing drainable shut-off valves at the lowest points during construction makes this annual process significantly easier and more reliable.
What kind of electrical outlets are required for an outdoor island, and how many do I need?
All electrical outlets in an outdoor kitchen island must be GFCI-protected (Ground Fault Circuit Interrupter) and housed in weatherproof, in-use covers to prevent moisture intrusion. You should plan for at least two separate 20-amp circuits: one dedicated to the refrigerator and another for outlets to power appliances like blenders or electric smokers without tripping the breaker. A common oversight is not installing an outlet near the main prep area, forcing you to run unsafe extension cords across a patio. Proper electrical planning is a non-negotiable safety requirement, not an optional upgrade.