
Cement Pavers in Charlotte County: My Protocol for a 30-Year Lifespan Against UV & Chloride Damage
I've been called in to fix more failed paver projects in Charlotte County than I can count. The pattern is always the same: sunken spots on a Port Charlotte driveway, weeds overtaking a patio in Punta Gorda’s historic district, or pavers near an Englewood canal turning chalky and pitted. The homeowner often blames the pavers, but the real failure almost always lies in a system that wasn't designed for our unique subtropical environment of intense sun, torrential rain, and salty air. The common approach of simply digging, adding a generic base, and laying pavers is a recipe for a 5-year replacement cycle. My entire process is built around defeating the two biggest enemies of cement pavers here: UV radiation which breaks down color and sealants, and chloride ingress from the salt air which corrodes the concrete from within. This isn't just about aesthetics; it's about engineering a system with a measurable increase in structural integrity and lifespan.The Core Diagnostic: My Sub-Base Hydrology Assessment
Before a single paver is ordered, I perform what I call the Sub-Base Hydrology Assessment. This is a non-negotiable first step. I once took over a large lanai project in a waterfront community where the previous contractor had installed a standard 4-inch base. Within a year, the entire surface had developed undulations. The problem wasn't the base thickness, but the complete disregard for the high water table and the extremely porous, sandy soil. They treated a Charlotte County property like one in the clay-heavy Midwest. My assessment focuses on three critical, often-ignored metrics that dictate the entire project's foundation.Deep-Dive into Geotechnical & Environmental Factors
The success of a paver installation is determined before the first paver is laid. It’s all in the sub-base preparation, which must be tailored specifically to our local conditions. A generic approach guarantees premature failure.- Soil Compaction and Proctor Density: Our local sandy soil requires a different approach to compaction. I aim for a 98% modified Proctor density. This often means compacting the aggregate base in thinner 2-inch lifts, not one single 4 or 6-inch layer. This prevents the "rebound effect" common in sand, ensuring a truly stable foundation that won't settle after the first hurricane season.
- Drainage and Permeability Planning: For properties in Punta Gorda, especially those with large, non-porous roof surfaces, I design the paver system to act as a part of the stormwater management plan. This involves calculating the runoff volume and ensuring the paver joints and sub-base can handle the flow, preventing erosion of the bedding sand and hydrostatic pressure buildup. A minimum 2% grade away from the foundation is my baseline.
- Edge Restraint Specification: Flimsy plastic edging is one of my biggest pet peeves. It warps under the Florida sun and offers zero lateral support. For any area with vehicle traffic or significant foot traffic, I specify a poured concrete bond beam restraint, tucked out of sight. This mechanically locks the entire paver field into a monolithic slab, preventing the pavers from shifting or separating over time.
My Proprietary Installation Protocol: A Step-by-Step Breakdown
Executing the plan requires precision. Deviating even slightly can compromise the entire system's longevity. This is the exact process I follow on every Charlotte County project.Critical Path to a Failure-Proof Paver System
- Excavation and Geotextile Barrier: I begin with a deeper excavation than most, typically 8-10 inches for patios and 12-14 inches for driveways. The first layer down is a crucial non-woven geotextile fabric. This separates our native sand from the aggregate base, preventing the base from sinking into the subsoil over time—a primary cause of paver settlement.
- Base Material and Multi-Lift Compaction: I use a specific blend of crushed concrete aggregate (#57 stone mixed with fines) to achieve optimal interlocking and compaction. Each 2-inch layer is lightly misted with water and compacted with a vibratory plate compactor until the target density is met. This meticulous process is what creates a truly unyielding foundation.
- Bedding Sand and Screeding: A uniform 1-inch layer of coarse, washed concrete sand (ASTM C33) is screeded to create a perfectly level bed for the pavers. Consistency here is key to preventing rocking pavers.
- Paver Laying and Jointing: Pavers are laid in the desired pattern, and then the most critical step for our climate begins: joint stabilization. I exclusively use a high-grade polymeric sand with built-in microbial inhibitors to prevent mold and weed growth in our humid environment.
- Sealing for Environmental Resistance: After the polymeric sand has cured, I apply two coats of a silane-siloxane penetrating sealer. Unlike cheap acrylic sealers that form a surface film doomed to peel under our UV exposure, this type of sealer penetrates deep into the paver's capillaries. It creates a hydrophobic barrier that repels water and chlorides, dramatically reducing fading and preventing spalling for a projected 25-30% increase in paver surface life.
Final Quality Control and Precision Adjustments
The final stage is about refinement. I perform a final pass with the plate compactor (using a protective mat) to fully lock the pavers into the bedding sand and settle the polymeric sand. I then perform a meticulous cleanup and a very specific water activation for the polymeric sand—a fine, sweeping mist applied three times, 15 minutes apart. Using a hard spray, a common error, can wash the essential polymers out of the joints before they can set. The area is then cordoned off for a full 48-hour curing period, a step that is vital for the long-term stability of the joints. After building hundreds of paver systems from North Port to Punta Gorda, I’ve learned that longevity isn't a feature; it's the direct result of a process engineered to combat local conditions. So, is your paver plan based on a generic checklist, or has it been truly engineered to withstand the specific hydrostatic and UV pressures of your Charlotte County property?Written by

Tags
cement driveway pavers
smooth concrete paver
concrete interlocking paver
aggregate pavers
installing cement pavers
Cement Pavers in Charlotte FL FAQ
My cement pavers are sinking and uneven. Can I fix this myself?
You can fix minor sinking, but widespread unevenness points to a serious base failure that requires a professional. For a few pavers, you will need to lift them, add more bedding sand, and use a rubber mallet to level them with the surrounding area. However, if the issue is extensive, the entire sub-base has likely washed out, often due to poor drainage. A professional rebuild involves re-grading the area and compacting new base material to prevent a recurrence, a step often skipped in DIY repairs that leads to the problem returning within a year.
Are cement pavers a good choice for a saltwater pool deck?
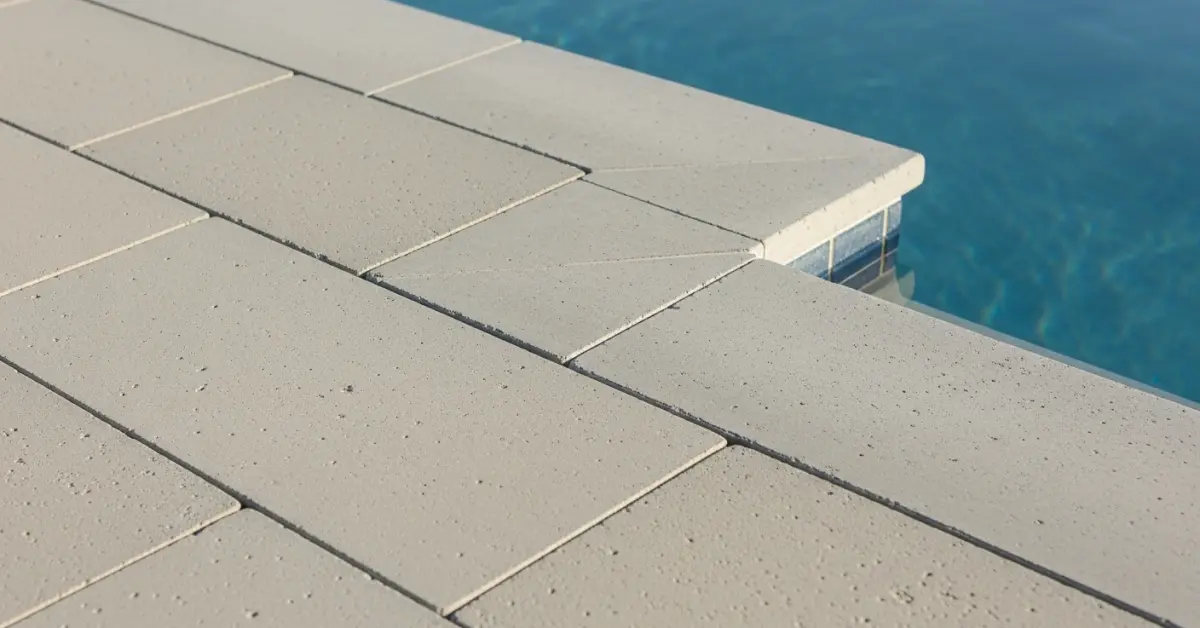
Yes, high-density cement pavers are an excellent choice for saltwater pools, provided they are properly sealed. Unsealed or low-quality pavers will absorb saltwater, which then evaporates and leaves behind salt crystals that expand and cause the paver surface to flake and crumble, a process called spalling. To prevent this, you must use a high-quality penetrating sealer specifically rated for saltwater environments and reapply it every 2-3 years. This creates a barrier that stops the salt from getting into the paver's pores in the first place.
Why are my pavers covered in a white, chalky film, and how do I remove it?
That white film is efflorescence, which is a natural deposit of salt that migrates from within the cement to the surface. It is a cosmetic issue, not a structural one, but it can be stubborn to remove if you use the wrong method. Avoid using muriatic acid, as it can damage the pavers' color and texture. Instead, use a specialized efflorescence cleaner and a stiff brush. The non-obvious cause is often excessive moisture coming up from the ground, so ensure your deck's drainage is working correctly to reduce future occurrences.
How do I stop weeds and ants from coming up between the paver joints?
Persistent weeds and ants indicate that the joint sand has failed and must be replaced with a modern, more durable material. The solution is to pressure wash the old sand and debris out of the joints and then sweep in new polymeric sand. When lightly wetted, this sand mixture hardens to form a durable, flexible bond that locks the pavers together while creating a barrier that is highly resistant to weeds, insects, and erosion from rain. Simply pulling weeds or spraying poison is a temporary fix that fails to address the compromised joints.
My pavers are stained from leaves and dirt. Is pressure washing safe?
Pressure washing is safe only if you use a wide-angle nozzle and keep it at least 30 cm (12 inches) from the surface. Using a high-pressure, narrow stream (a common mistake) will not only strip away the protective sealer but can also etch the paver surface and blast out the crucial jointing sand that locks the pavers in place. This destabilizes the entire deck, leading to wobbly pavers. For tough organic stains, it is far safer to pre-treat the area with an oxygen-based cleaner before using a low-pressure rinse.
The pavers right next to my pool coping are loose. Is this a deck or a pool problem?
Loose pavers directly against the pool's edge often signal a problem with the pool shell itself, not just the deck. This is a critical warning sign that the bond beam, the concrete collar at the top of the pool wall, may be cracked or shifting. Water leaking from the pool structure can wash out the sub-base beneath those specific pavers, causing them to loosen and sink. Before resetting the pavers, a technician must carefully inspect the coping and the pool shell for any signs of structural failure, as simply re-laying them ignores a potentially major repair.


