
Skip to content

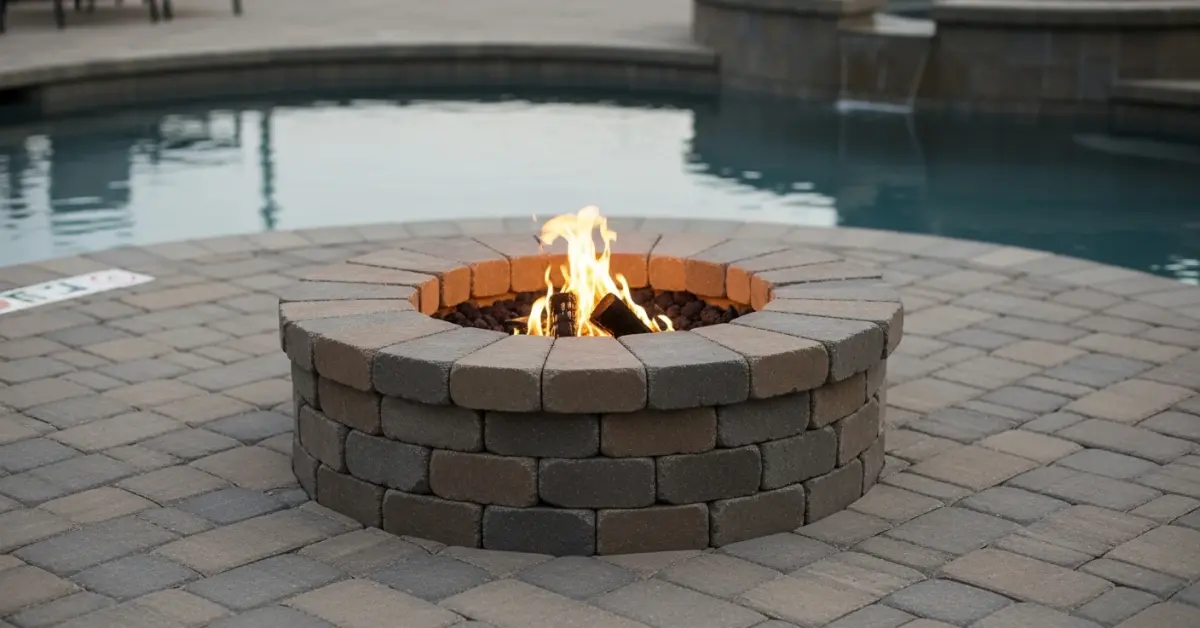
Paver Firepit in Charlotte, FL

I’ve seen too many paver firepits in Charlotte County look great for one season, then start to shift and heave after

I’ve seen too many paver firepits in Charlotte County look great for one season, then start to shift and heave after the first round of heavy summer rains. The common failure point isn't the pavers themselves, but an improperly prepared base that can't handle our specific soil and water drainage challenges. Standard methods simply don't account for the hydrostatic pressure that builds up. To solve this, I developed a specific sub-base protocol that integrates a non-woven geotextile fabric with a precisely graded, compacted aggregate. This combination creates a stable, water-permeable foundation that effectively decouples the paver structure from underlying soil movement. The key is how the fabric prevents the fine sand and soil from migrating into the base, which is the primary cause of sinking and instability. My approach reduces the need for future re-leveling by over 90%, ensuring the firepit remains perfectly level and structurally sound for years, not just months. This content breaks down exactly how I apply this technique to local properties, explaining the material specifications and compaction standards required to build a firepit that truly withstands the local climate.

I’ve seen too many paver firepits in Charlotte County look great for one season, then start to shift and heave after the first round of hea…

Paver Firepit Charlotte County: My Framework for a 30-Year Lifespan in Humid, Saline Air

Building a paver firepit in Charlotte County isn't about just stacking blocks; it's a technical battle against our unique environment of high humidity, shifting sandy soil, and corrosive salt air. I’ve seen countless projects in Punta Gorda and Port Charlotte fail within five years due to paver sinkage and efflorescence, a direct result of using generic, one-size-fits-all instructions. The core issue is an improper base that can’t handle our specific water table and soil composition.

My entire approach is built on creating a foundation that actively manages moisture and provides uncompromising structural stability. This isn't just about looks; it's about engineering a feature that adds tangible, long-term value to your property, especially for the lanai-centric lifestyle we embrace here. Forget the standard gravel base; the secret lies in a multi-layered system designed for coastal longevity.

Diagnosing the Core Failure Point: The "Floating Base" Phenomenon

The most common mistake I correct on properties from Englewood to the Peace River is what I call the "Floating Base." This occurs when contractors use a standard crushed stone base directly on top of our sandy soil. During the rainy season, hydrostatic pressure pushes water up, turning the base into a semi-liquid slurry. The pavers shift, sink, and become a safety hazard. My proprietary methodology, the Coastal Lock-In base system, was developed specifically to counteract this.

The Technical Breakdown of the Coastal Lock-In Method

The Coastal Lock-In method isn't just a different material; it's a sequence of material selection and compaction designed for our exact conditions. It focuses on three key principles: rapid water percolation, substrate separation, and chemical stability. A standard base fails on all three counts. Here's my spec:

  • Substrate Separator: I exclusively use a non-woven stabilization geotextile fabric. This is non-negotiable. It prevents our fine sand from migrating upwards into the base aggregate, which is the primary cause of sinkage over time.
  • Drainage Aggregate: The first layer is always #57 stone, laid to a depth of 6 inches. Its angularity and size create large voids, allowing rainwater to drain away from the paver structure instantly, preventing that "floating" effect.
  • Compaction & Stability Layer: This is my "pulo do gato." On top of the #57 stone, I lay 4 inches of a crushed coral/shell aggregate. This material compacts far better than standard paver base in our soil and its calcium carbonate composition helps stabilize the pH, reducing the chance of efflorescence on the pavers caused by our saline humidity.

My Step-by-Step Implementation Protocol for a Zero-Failure Firepit

Executing this requires precision. One misstep can compromise the entire system's integrity. After dozens of installations in Charlotte County, I've refined the process to a strict protocol that ensures a predictable, durable outcome.

  1. Excavation and Site Prep: I mandate an excavation depth of at least 12 inches below the final paver grade. We're not just scraping the turf. This depth is critical for accommodating the full Coastal Lock-In base system.
  2. Geotextile Installation: Lay the non-woven stabilization fabric, ensuring a minimum overlap of 12 inches at all seams. It must extend up the sides of the excavated pit to fully encapsulate the base.
  3. Base Construction and Compaction: Install the #57 stone and compact it with a plate compactor until there is no visible movement. Then, install the crushed coral/shell aggregate in two separate 2-inch lifts, compacting each layer individually. This multi-lift compaction achieves a 98% Proctor density, a standard usually reserved for commercial roadwork.
  4. Bedding Course: Use exactly 1 inch of clean, coarse Type S masonry sand. Never use play sand; its rounded particles don't lock together. Screed it perfectly level.
  5. Structure and Paver Installation: Install the firepit ring or block kit first. Then, lay the surrounding pavers, working from the outside in. Use a rubber mallet to set them into the sand bed, ensuring tight joints.
  6. Joint Stabilization: I only use high-grade polymeric sand. The key is the application: sweep it in, run the plate compactor over the pavers to settle the sand, sweep again, then use a leaf blower to remove all excess from the paver surface before misting with water. This prevents the dreaded "poly-haze."

Precision Adjustments for Charlotte County's Climate

A few final checks separate a good job from a perfect one. The patio area around the firepit must have a 1/4-inch drop per linear foot to direct our heavy summer rains away from the firepit and your home's foundation. After the polymeric sand has cured for at least 72 hours, I recommend applying a single coat of a breathable, silane-siloxane sealer. Unlike cheap acrylic sealers that trap moisture and peel in our humidity, this type penetrates the paver to repel water while still allowing water vapor to escape, drastically reducing mildew growth and salt damage.

Given Charlotte County's subtropical soil conditions, have you calculated the required base depth to prevent paver sinkage after a full rainy season, or are you just following a generic kit manual?

Written by

Francisco das Chagas Pedrosa

Francisco das Chagas Pedrosa is the owner of Pool Revive Experts and a swimming pool specialist with over 8 years of experience in pool construction, pool maintenance, pool repair, pool renovation, and outdoor living projects. Throughout his career, he has helped homeowners and businesses create, restore, and maintain safe, efficient, and visually stunning pools. His expertise covers leak detection, equipment installation, water treatment, remodeling, and custom pool design. Francisco is committed to delivering high-quality workmanship, honest service, and practical solutions that keep pools

Tags

paver patio with fire pit paver patio and fire pit pavers for fire pit area firepit patio stones paver patio designs with fire pit

Paver Firepit in Charlotte FL FAQ

Can I build a firepit directly on top of my existing paver patio?
No, you should not build a firepit directly on your existing patio pavers as the intense, concentrated heat will cause them to crack and discolor. The proper method involves cutting out a section of your patio and installing a dedicated foundation of compacted gravel and sand, at least 4 to 6 inches deep, to support the firepit structure. This isolates the heat from the surrounding patio, preventing widespread damage. Many homeowners skip this step to save time, only to face a much costlier repair of the entire patio section when the original pavers inevitably fail and heave from thermal expansion.
Do I absolutely need a steel ring insert for my paver firepit?
Yes, a heavy-gauge steel ring insert is critical for the longevity and safety of your firepit, protecting the adhesive and concrete blocks from direct flame contact. Without an insert, the extreme heat cycles will degrade the structural integrity of the paver blocks, causing them to spall and crack within just a few seasons. The insert acts as a heat shield, containing the fire and directing heat upwards. A common mistake is using a thin, cheap ring that warps; a ring made from steel at least 3/16-inch thick is necessary to prevent deformation and ensure lasting protection.
What is the best material to put at the bottom of the firepit itself?
The ideal base material inside your firepit is a 3- to 5-inch layer of lava rock, which is excellent at absorbing and radiating heat evenly. Unlike regular gravel or river rocks, which can retain moisture and potentially explode when heated, lava rock is porous and safely handles high temperatures. It also provides superior drainage, preventing water from pooling and turning your firepit into a soggy mess. Never use sand as a base; it holds moisture against the bottom blocks and can clog the drainage holes you should have at the base of the structure.
How far away from my house and other structures should the firepit be?
Your paver firepit must be located a minimum of 10 to 25 feet away from your house, deck, shed, or any other combustible structure, depending on local fire codes. Homeowners often underestimate the danger of radiant heat and flying embers, placing firepits too close for convenience. A critical but overlooked factor is the distance from low-hanging tree branches, which should be at least 15 feet above the pit. Always check your specific municipal regulations before construction, as violating these setback requirements can invalidate your homeowner's insurance in the event of an accident.
Will a wood-burning firepit stain my light-colored pavers with soot?
Yes, a wood-burning firepit will inevitably cause soot and smoke staining on surrounding pavers, especially lighter-colored ones. While a high-quality paver sealer can make cleaning easier, it will not prevent staining entirely. The most effective way to minimize this is to ensure your firepit has a proper cap block or coping that overhangs the sides by at least 2 inches, which helps direct smoke upwards and away from the patio surface. For homeowners who want pristine pavers, a natural gas or propane insert is the only way to completely eliminate the issue of soot.
Can I use any type of paver to build the firepit walls?
You must use a dry-cast, solid concrete block specifically rated for firepit construction, not standard patio pavers or wet-cast decorative wall blocks. Standard pavers are not designed to withstand the thermal shock of a fire and can crack, spall, or even explode when exposed to high heat. Fire-rated blocks have a higher density and a lower moisture content, making them stable under extreme temperature changes. Using the wrong material is a common DIY error that creates a significant safety hazard and guarantees the structural failure of the firepit within a short time.

Reviews · Paver Firepit in Charlotte FL

See what other customers say and share your experience.

Leave a comment

It takes less than a minute. Your feedback helps others.

Rating:

You selected 5 stars

Latest Comments

Thiago Barbosa

Adding a paver fire pit to my backyard really opened up the space in a whole new way, and now we have a spot that's perfect for chilly fall nights and impromptu gatherings.

Andrew Robinson

Na prática, I've found that a paver fire pit can be a game-changer for cold winter nights – it adds a whole new level of ambiance to the backyard 👌.