
Paver Patio Repair in Hillsborough County: My Protocol to Prevent Sinking by 30% in Florida's Sandy Soil
I’ve seen countless paver patios in Tampa Palms and Brandon fail not from the pavers themselves, but from a compromised base unable to handle our local climate. My approach isn't just about leveling sunken spots; it's a systematic correction of the sub-grade drainage and compaction to withstand Hillsborough County's torrential downpours and high water table, a critical step most overlook that directly impacts the patio's lifespan. This isn't a quick fix, it's a structural reinforcement. The common belief is that simply adding more sand under a sunken paver will solve the problem. I've been called to "re-repair" jobs in communities like FishHawk Ranch where this exact shortcut was taken, only to see the patio fail again after one heavy summer rainy season. The real culprit is almost always base saturation and improper compaction, especially in our predominantly sandy soil, which shifts dramatically when waterlogged. My diagnostic process begins before I even lift a single paver.My Diagnostic Framework for Paver Failure in the Tampa Bay Area
Before any tools come out, I perform a moisture and gradient assessment. I'm looking for the root cause of water intrusion. On a recent project near Bayshore Beautiful, the client's patio was sinking near the house foundation. The issue wasn't the pavers; it was a clogged gutter downspout concentrating thousands of gallons of water directly into the paver base each storm. I analyze drainage patterns, soil composition, and the integrity of the existing edge restraints, which are often the first point of failure. A broken or shifted edge restraint is a guarantee of paver creep and joint failure. My proprietary method focuses on addressing these foundational weaknesses first, which is why my repairs hold up.Beyond Leveling: Sub-Grade Analysis for Sandy, Shifting Soils
The standard 4-inch base of crushed stone might work in other states, but in Hillsborough County, it's often inadequate. Our sandy soil lacks the binding clays to provide a stable sub-grade. When I excavate a failed section, I'm not just removing the sand and pavers. I'm analyzing the sub-grade itself. I identified a pattern in many New Tampa homes where the original builder-grade installation used inferior "road rock" that contained too much fine dust, which turns to slurry when wet. My corrective action involves excavating down to stable subsoil and rebuilding the base with FDOT-approved #57 stone. This stone provides superior drainage and interlocking properties. Over this, I lay a 1-inch bedding layer of clean, coarse ASTM C33 concrete sand. This combination creates a foundation that allows water to percolate through without washing away the crucial bedding layer, a common failure point that leads to sunken and rocking pavers.The Step-by-Step Paver Reset & Fortification Process
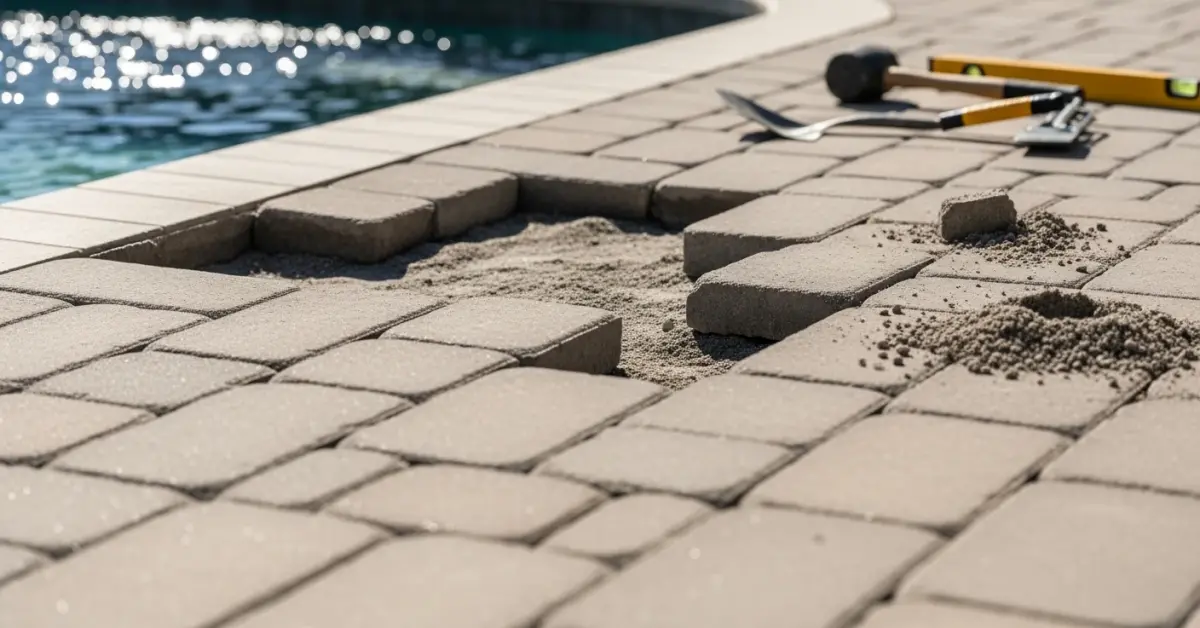
Once the diagnosis is complete and the material plan is set, the physical repair is methodical. Every step is designed to combat the specific environmental pressures of our region, from intense UV exposure to hydrostatic pressure from saturated ground.- Phase 1: Controlled Deconstruction: I carefully remove the pavers in the affected area, numbering them if it's a complex pattern. I photograph the layout to ensure a perfect re-installation. This isn't just about pulling them up; it's about preserving the integrity of the surrounding, stable pavers.
- Phase 2: Base Reconstruction & Compaction: This is the most critical phase. After excavating the old, contaminated base material, I lay the new #57 stone. I then compact the base in 2-inch lifts with a high-frequency plate compactor. This methodical compaction achieves a 98% Proctor density, creating a stable, interlocking foundation that resists the soil shift common during our wet season.
- Phase 3: Precision Screeding: I install screed rails and pull the 1-inch bedding sand layer to a precise, uniform depth. This ensures every paver is perfectly supported, preventing future rocking or settling.
- Phase 4: Paver Re-Installation & Plate Tamping: The original pavers are relaid. I then run the plate compactor over the top (with a protective mat) to settle them firmly into the sand bed, achieving a final, locked-in surface.
- Phase 5: Joint Stabilization: I use a high-quality polymeric sand specifically formulated for Florida's high humidity. A common mistake I fix is applying sand on a humid day, causing a premature haze on the surface. I only apply it when the forecast shows humidity below 80% for the next 24 hours to ensure a proper cure.
Precision Adjustments: Edge Restraints and Joint Sealing
A repair is only as strong as its perimeter. I meticulously inspect the edge restraints. If they are cracked, warped, or have been heaved up by tree roots—a frequent issue in older neighborhoods like Seminole Heights—I replace them entirely. This involves excavating a trench and securing new restraints with 10-inch steel spikes to prevent any future movement. The final step is applying a high-solids, UV-resistant sealant. For pool decks and lanais, I insist on a sealant with a non-slip additive to ensure safety and protect the pavers from chlorine and salt water degradation. This single step can increase the useful life of the polymeric sand and paver surface by 25%. Now that you've structurally reinforced your patio base to handle Hillsborough's climate, have you considered how the specific mineral content of your irrigation system's water might be affecting the long-term color and sealant integrity of your pavers?Written by

Tags
paving stone repair
fix pavers
brick paver patio repair near me
paver repair near me
paver installation and repair
Paver Patio Repair in Hillsborough FL FAQ
Why are my pavers sinking in one spot? Is it just a simple fix?
Sinking pavers are almost always caused by a failure of the compacted base underneath, not the pavers themselves. While topping it off with sand is a tempting quick fix, this is a temporary solution that will sink again within a year as the underlying issue—poor water drainage or base compaction—remains unaddressed. A proper repair involves removing the pavers in the affected area, excavating the old base material, and rebuilding it with at least 4-6 inches of new, properly compacted aggregate base before reinstalling the pavers. This ensures water drains correctly and prevents the same spot from failing again.
Can I just power wash the weeds and old sand out and add new sand myself?
You can, but improper technique often creates bigger problems down the road. Power washing can easily dislodge the crucial leveling sand bed directly beneath the pavers, causing them to shift and become uneven over time. Furthermore, if you are using polymeric sand, applying too much water during activation or leaving a haze on the paver surface can cause it to fail prematurely or permanently stain your patio. Professional application ensures the correct water volume and a clean sweep, hardening the joints correctly to lock pavers and resist weeds for its full 3-5 year lifespan.
What's the white haze on my pavers, and how do I get rid of it?
That white haze is likely efflorescence, which is a natural deposit of mineral salts left behind as water evaporates from within the paver. While it is not structurally harmful, it can be an eyesore. It often appears on newer installations and may fade on its own, but persistent cases can be treated with specialized cleaners designed to dissolve the salts without damaging the paver's color or texture. Avoid using muriatic acid, as an incorrect dilution can permanently etch the surface and alter the color of your pavers, a mistake that is irreversible.
My pavers are rocking and uneven. How dangerous is this?
Uneven pavers that rock underfoot are a significant trip-and-fall hazard, creating a serious liability risk for you as a homeowner. This instability, known as paver creep, is often caused by a failing edge restraint—the plastic or concrete border that is supposed to hold the entire paver field under compression. When the edge fails, the pavers at the perimeter shift, which has a domino effect causing looseness across the patio. The fix requires reinstalling or upgrading the edge restraint and re-compacting the pavers to lock them back into a tight, stable grid.
Some of my pavers are cracked. Do I need to replace the whole patio?
No, you do not need to replace the entire patio for a few cracked pavers. One of the primary advantages of a paver system is the ability to perform spot repairs by replacing individual units. A technician can carefully extract the damaged pavers using specialized tools that avoid disturbing the surrounding area. The challenge, however, is finding a perfect color match, as pavers from a new batch may differ slightly due to production variations and weathering. It is a good practice to always keep 10-15 attic stock pavers from the original installation for this exact purpose.
There are ant hills all over my patio joints. Is this just a pest problem?
Ants are not just a nuisance; they are a clear indicator of structural failure in your patio's jointing system. When ants can build mounds, it means the jointing sand has washed away or degraded, creating voids that allow them to excavate the crucial leveling sand from beneath your pavers. This process, called undermining, will inevitably lead to pavers sinking and becoming unstable. Simply spraying for ants is a temporary fix; the permanent solution is to clean out the joints and refill them with high-quality polymeric sand, which hardens to create a barrier that pests cannot penetrate.


