
Power Wash And Seal Pavers Pasco County: My Protocol for Preventing Subtropical Algae Bloom and 30% Lifespan Extension
After a decade specializing in paver restoration here in Pasco County, I can tell you the single biggest mistake I see is treating power washing and sealing as a simple cleaning job. It’s a technical preservation process. The intense Florida sun and relentless humidity, especially in communities like Trinity and Land O' Lakes with their beautiful lanai and pool deck setups, create a unique battleground. I’ve been called to fix countless jobs where a high-PSI wand has permanently etched the paver surface or a cheap, big-box store sealer has turned a beautiful driveway in Wesley Chapel into a yellow, peeling mess within six months. This isn't just about aesthetics; it’s about protecting a significant investment. My entire methodology is built around one principle: surface integrity first. Before I even consider applying a sealer, my process focuses on diagnosing the paver’s current state and addressing the root causes of degradation unique to our local climate. A standard "blast and seal" approach is a recipe for trapping moisture, promoting algae growth from within, and ultimately costing the homeowner more in the long run. I’ve refined a system that ensures the pavers are not just clean, but chemically and structurally ready for a seal that will last.My Diagnostic Framework: Assessing Paver Degradation Before a Single Drop of Water is Sprayed
The most critical phase of my work happens before any equipment is turned on. I conduct a full diagnostic, because what you can't see is often what causes the most damage. I once took over a project in New Port Richey where the previous contractor sealed over hidden efflorescence. The result was a catastrophic failure of the sealer, creating a milky, cloudy film that required a full chemical strip and grind to remove. That expensive lesson for the homeowner solidified my multi-point inspection process.Sealer Selection: Why Water-Based Urethane Outperforms Acrylics in the Pasco County Sun
This is the technical core of a successful project. The choice of sealer is not a matter of preference; it's a matter of chemistry. In our high-humidity, high-UV environment, the wrong sealer doesn't just fail—it can actively damage your pavers. My go-to is not a film-forming acrylic, which I see fail constantly around here. I exclusively use a penetrating, water-based silane/siloxane blend or a high-end two-part urethane. These formulations work by chemically bonding inside the paver's capillaries. Instead of creating a plastic-like film on top, they create a hydrophobic barrier within the paver itself. This allows the paver to breathe and release moisture vapor, a non-negotiable feature in Florida's climate, which drastically reduces the risk of efflorescence being trapped under the seal. A key performance indicator I target is achieving a <5% moisture absorption rate post-application, something most acrylic sealers can't maintain for more than a few months under our sun.My Step-by-Step Execution: From Pressure Washing to Joint Stabilization
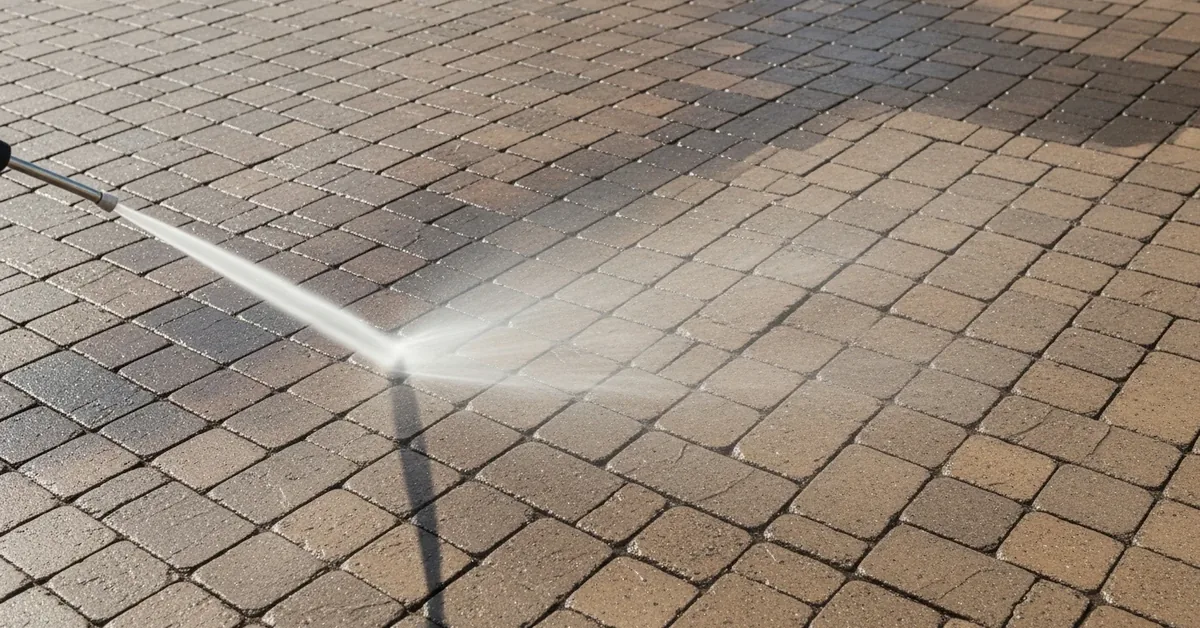
Execution is about precision, not brute force. Each step is designed to prepare the surface for a perfect chemical bond with the sealer. Rushing any of these stages is the primary reason for premature failure.- Phase 1: Controlled Pressure Washing. I never use a high-pressure wand directly on the paver face. I utilize a commercial-grade surface cleaner attachment that distributes pressure evenly. I keep my machine calibrated to a maximum of 2,200 PSI, which is enough to deep clean without damaging the paver's cream layer. For algae and mold, I pre-treat with a sodium hypochlorite solution, allowing chemistry to do the heavy lifting, not aggressive pressure.
- Phase 2: Joint Decontamination and Refill. This is a step many overlook. I blast out at least 1/4 inch of the old joint sand, which is often contaminated with organic matter. After a thorough rinse, I allow a 24-hour drying period—I use a moisture meter to confirm the joints are bone dry. I then install fresh, high-grade polymeric sand. This sand contains a polymer that, when activated with a light mist of water, hardens to lock the pavers in place and inhibit weed growth.
- Phase 3: Sealer Application. Applying the sealer is a delicate process. I never use rollers, as they can leave streaks and an uneven coat. My method involves a battery-powered, low-pressure sprayer with a fan-tip nozzle. I apply a saturating "flood coat" to ensure the sealer penetrates deeply into the paver and joints, followed immediately by a light "mist coat" to even out the finish. This two-part application ensures complete coverage and a uniform, natural sheen.
Post-Application QC: The 72-Hour Curing Window and My Final Inspection Checklist
The job isn't finished when I pack up my truck. The 72-hour curing period is critical. I provide clients with explicit instructions to avoid any foot traffic for at least 24 hours and to keep irrigation systems and vehicles off the surface for the full 72 hours. My final quality control visit involves a detailed inspection. I check for any blotchiness or hazing, which indicates a curing issue. The final test is simple: I pour a cup of water onto the surface. If it beads up instantly like on a freshly waxed car, I know the hydrophobic barrier is fully established and the project meets my standard. Now that you understand the chemistry separating a temporary clean from a long-term preservation seal, are you certain your paver surface isn't just a ticking clock for a costly restoration?Written by

Tags
power wash paver driveway
pressure washing paver driveway
cleaning pavers with pressure washer
cleaning brick pavers with pressure washer
power washer for pavers
Power Wash And Seal Pavers in Pasco FL FAQ
Will sealing my pavers make my pool deck slippery and dangerous when wet?
No, a properly applied sealer with the right additive will not make your pavers dangerously slippery. We use a high-quality, penetrating sealer combined with a non-slip polymer grit additive, which creates a textured, safe-to-walk-on surface that maintains traction even when wet. Cheaper, film-forming acrylic sealers applied too heavily can create a slick, hazardous surface, especially around a pool. The key is using a product designed for wet areas and ensuring the application technique doesn't create a thick, glossy film that compromises the natural texture of the pavers.
How do you handle the weeds and moss growing between my pavers? Will they just grow back?
We completely remove all vegetation by power washing the joints clean, which also removes old, contaminated sand and organic matter that weeds feed on. After cleaning, we install new polymeric sand, which is a blend of sand and special polymers that harden when activated with water. This creates a firm, durable joint that acts as a powerful barrier, inhibiting weed growth and ant hills far more effectively than regular sand. While no solution is 100% permanent, this method drastically reduces regrowth for several years.
Can't I just rent a pressure washer and do this myself for cheaper?
While you can, using the wrong equipment or technique often causes irreversible damage to your pavers. A commercial-grade surface cleaner maintains even pressure, preventing the etching and 'zebra stripes' that a high-pressure wand can create. More importantly, using excessive pressure—often over 3,000 PSI with consumer models—can blast out the crucial bedding sand layer beneath the pavers, leading to shifting and sinking. Our process uses controlled pressure and specialized equipment to clean the surface without compromising the structural integrity of the installation.
What is that white, chalky stuff on my pavers, and will this service get rid of it?
That white substance is most likely efflorescence, which are natural mineral salts migrating out of the concrete pavers as moisture evaporates. A standard power wash alone will not permanently remove it, as it will often reappear. Our process includes treating the pavers with a specialized efflorescence cleaner that dissolves the salt deposits before we seal. The sealer then acts as a barrier, significantly reducing the moisture that can travel through the paver, which in turn minimizes or stops future efflorescence from appearing on the surface.
How long does the sealer last, and how often do I need to get this done?
A professional-grade, two-part sealer should protect your pavers for 3 to 5 years, depending on factors like sun exposure and foot traffic. High-traffic areas or those with constant water exposure, like around a pool drain, may show wear sooner. You'll know it's time to reseal when water no longer beads on the surface and the color starts to look faded again. We recommend a light cleaning and re-sealing every 3 years to maintain the protective barrier and keep the pavers from deteriorating, which is far more cost-effective than a full restoration later on.
My pavers are uneven and some have sunk. Can you fix this before sealing?
Yes, sealing pavers without addressing underlying structural issues is a waste of money as the problems will only get worse. Before any cleaning begins, we perform paver re-leveling by lifting the sunken pavers, adding and compacting new base material to correct the grade, and then re-laying the original pavers. This ensures a stable, even surface. Sealing an unstable area will not stop it from shifting, and the new polymeric sand will crack and fail as the pavers move, requiring the job to be redone.


