
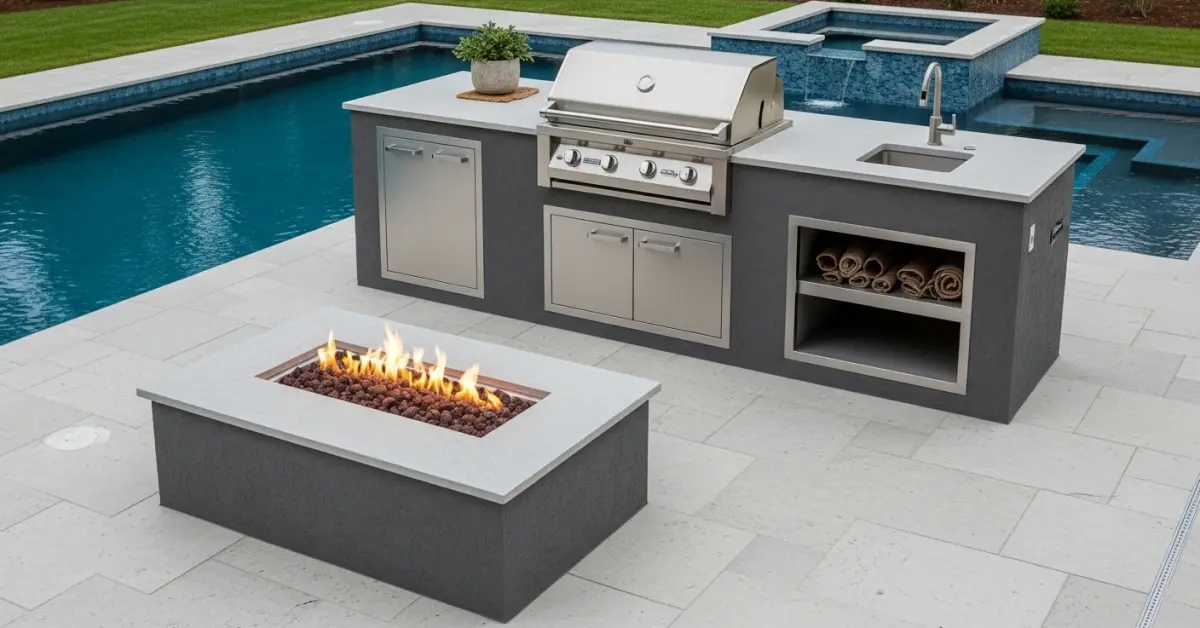
Lake County Outdoor Kitchen & Fire Pit: My Framework for Preventing Moisture Damage and Maximizing Airflow
As a specialist who has designed and diagnosed outdoor living spaces across Lake County for over a decade, I’ve seen the same critical failure point time and again. It isn’t the brand of the grill or the type of stone used; it's a fundamental misunderstanding of our unique Central Florida climate. The intense humidity, coupled with sudden, heavy downpours, creates a perfect storm for trapped moisture, leading to premature rust, mold growth within the island structure, and electrical failures. My entire approach is built not on aesthetics first, but on creating a resilient, breathable structure that is immune to these local environmental pressures. This is why I developed my proprietary V.D.M. (Ventilation, Drainage, Material) Protocol. It’s a system I perfected after a particularly challenging project on a lakeside property in Tavares, where a two-year-old, six-figure outdoor kitchen was already showing signs of significant structural decay. The builder had ignored subsurface water runoff and used standard-grade steel, a fatal error. My V.D.M. protocol addresses these environmental dynamics from the ground up, ensuring the outdoor kitchen and fire pit don't just survive but thrive for decades, not just a few seasons.The Core Mistake in Lake County Outdoor Living Spaces and My V.D.M. Protocol
The most common error I diagnose is treating an outdoor kitchen island like an indoor cabinet. Builders seal it up, thinking they are protecting it. In reality, they are creating a moisture trap. The daily temperature fluctuations in areas like Clermont cause condensation to form inside the sealed structure. With no way to escape, this moisture saturates insulation, corrodes fasteners, and becomes a breeding ground for mold. The V.D.M. Protocol is my direct countermeasure to this pervasive issue.Deconstructing the V.D.M. Framework: Airflow Dynamics and Material Science
The protocol's success hinges on three interconnected pillars. Neglecting one compromises the entire system.- Ventilation: This is about more than just a vent hood for the grill. I mandate a minimum of two sets of passive vents on opposing sides of the kitchen island to create constant cross-ventilation. For gas appliances, I calculate the required airflow to prevent gas buildup, but crucially, I also calculate it to facilitate moisture evaporation. For fire pits, especially gas models, proper venting in the base is non-negotiable to prevent heat from damaging the internal components and the surrounding hardscape. I aim for a design that promotes a natural chimney effect, drawing cool air in from the bottom and expelling warm, moist air from the top.
- Drainage: Lake County’s sudden downpours can overwhelm poorly planned surfaces. My protocol starts below the surface. I mandate a sub-base of crushed stone under the concrete pad, which allows water to percolate away instead of pooling. The concrete slab itself is poured with a precise 1/4-inch-per-foot slope away from any structures. For countertop surfaces, I specify the use of epoxy-based grout instead of traditional cementitious grout, as it's non-porous and resists mildew.
- Material: Material selection is my final line of defense. I specify 316-grade stainless steel for all appliances, doors, and hardware, especially for homes near Lake Harris or Lake Minneola where the air has higher moisture content. For the framing, I forbid the use of wood or standard steel studs; my standard is galvanized steel or aluminum framing, which is impervious to rust and rot. For countertops, I steer clients in Mount Dora away from porous stones like travertine and towards high-density quartzite or granite.
Step-by-Step Execution: From Foundation to First Fire
Implementing the V.D.M. Protocol requires a strict sequence of operations. Reversing or skipping a step is a guaranteed way to introduce a future failure point. My on-site checklist is rigorous.- Site Preparation & Foundation: We begin by excavating the site and laying the crushed stone sub-base. The concrete pad is then formed and poured, ensuring the slope is perfect. All utility conduits for gas, water, and electrical are placed within the pour, sealed at both ends to prevent water ingress. This is the bedrock of the entire project.
- Structural Framing and Utility Rough-In: I personally inspect the framing assembly to ensure all fasteners are stainless steel and that the structure is square and level. During this phase, we install the ventilation sleeves and boxes. This is a critical step I see many contractors miss; they often cut vents after the cladding is on, which compromises the moisture barrier.
- Moisture Barrier and Cladding Application: A commercial-grade, self-adhering moisture barrier is applied to the entire exterior of the frame. This is the equivalent of a raincoat for the island's bones. Only then is the stone veneer or other cladding material applied, with weep holes integrated at the base to allow any incidental moisture to escape.
- Appliance and Countertop Installation: Appliances are installed and connected, with all connections checked for leaks and proper seals. The countertop is set using a 100% silicone adhesive, and the perimeter is sealed. A final inspection of all vents ensures they are unobstructed and functional.
The 5% Adjustments That Guarantee 99% Performance
Over the years, I’ve refined a list of small details that have an outsized impact on the longevity and usability of an outdoor kitchen in our climate.- Fire Pit Airflow: The placement of the fire pit's intake vents must consider the prevailing breeze. I position them to create a clean burn that pulls smoke up and away from the seating and cooking areas, a common complaint I hear about poorly designed layouts.
- Grout and Sealant Curing: I insist on a 72-hour curing period for all sealants and grouts before the kitchen is used. Firing up a grill too early can compromise the chemical bond, leading to premature failure.
- Strategic Lighting: Using downward-facing, warm-temperature (under 3000K) LED lighting minimizes the attraction of insects, which are a constant presence on humid Lake County evenings.
- The Drip Edge: A subtle but vital detail is specifying a 1.5-inch overhang on the countertops with a built-in drip edge. This small channel prevents rainwater from running down the face of the cabinets, stopping water stains and reducing moisture exposure at the base of the island.
Written by

Tags
fire pit outdoor kitchen
outdoor fire pit kitchen
outdoor kitchen and fire pit
l shaped outdoor kitchen
brick outdoor kitchen
Outdoor Kitchen with Fire Pit in Lake FL FAQ
How far does my fire pit need to be from my pool and house for safety?
Your fire pit must be a minimum of 3 meters (10 feet) away from your house, pool edge, and any combustible structures like a deck or fence. This distance is a standard fire code requirement to prevent radiant heat from damaging surfaces or igniting materials. A common mistake is placing it too close to the pool, which can cause thermal shock and crack the pool's coping or tile line, especially with concrete pools. Also, consider the prevailing wind direction to ensure smoke and embers are consistently blown away from your main seating areas and the house itself.
Can I use the same gas line for my pool heater and my new outdoor kitchen grill?
Tapping into your existing pool heater's gas line is often possible but requires a professional load calculation to ensure adequate gas volume and pressure. Your gas line must be sized to handle the simultaneous demand of all appliances; an undersized line will cause poor performance, like a weak flame on the grill when the heater kicks on. A critical, often overlooked detail is the need for a separate, accessible shut-off valve for each appliance, which is a non-negotiable safety requirement for emergency situations and routine maintenance.
What countertop material won't get ruined by pool water and direct sun?
For durability against both chlorinated water and UV rays, sealed granite or concrete are superior choices for outdoor kitchen countertops near a pool. While quartz is popular indoors, most are not warrantied for outdoor use as the resins can yellow and degrade in direct sunlight. A key factor people miss is thermal expansion; dark-colored granite can become extremely hot, posing a burn risk. Lighter-colored, properly sealed natural stone offers the best balance of longevity, stain resistance from food and pool chemicals, and manageable surface temperature.
Do I need special drainage for my outdoor kitchen sink and prep area?
Yes, you must install a dedicated drainage system for your outdoor kitchen that does not run off onto the pool deck or into the pool. Allowing grease, cleaning agents, and food waste to enter the pool will create a constant battle with water chemistry, leading to algae blooms and high chlorine demand. A proper installation involves tying into your home's main sewer line or installing a dry well. This prevents staining of your deck material and protects the pool's plaster from being etched by acidic food and drink spills.
What type of pavers or decking is best around a fire pit and kitchen area?
Concrete pavers or natural stone like travertine are the best choices for flooring around a fire pit and kitchen due to their high fire resistance and durability. Avoid using composite decking or wood immediately around a fire pit, as stray embers can easily melt or ignite the surface. A critical consideration often missed is the sealant; use a non-slip, matte-finish sealant instead of a high-gloss one. High-gloss sealants become extremely slippery when wet from pool splash-out or kitchen spills, creating a significant safety hazard.
Are there regulations for the electrical outlets in an outdoor kitchen near a pool?
All electrical outlets in your outdoor kitchen must be Ground Fault Circuit Interrupter (GFCI) protected and housed in weatherproof, in-use covers. National electrical codes mandate that any outlet within 6 meters (20 feet) of the water's edge must have GFCI protection to prevent electrocution risk. Homeowners often underestimate the need for multiple, dedicated circuits. Running a refrigerator, lighting, and a rotisserie on a single circuit can lead to frequent breaker trips, so plan for at least two separate 20-amp circuits for the kitchen area alone.


