
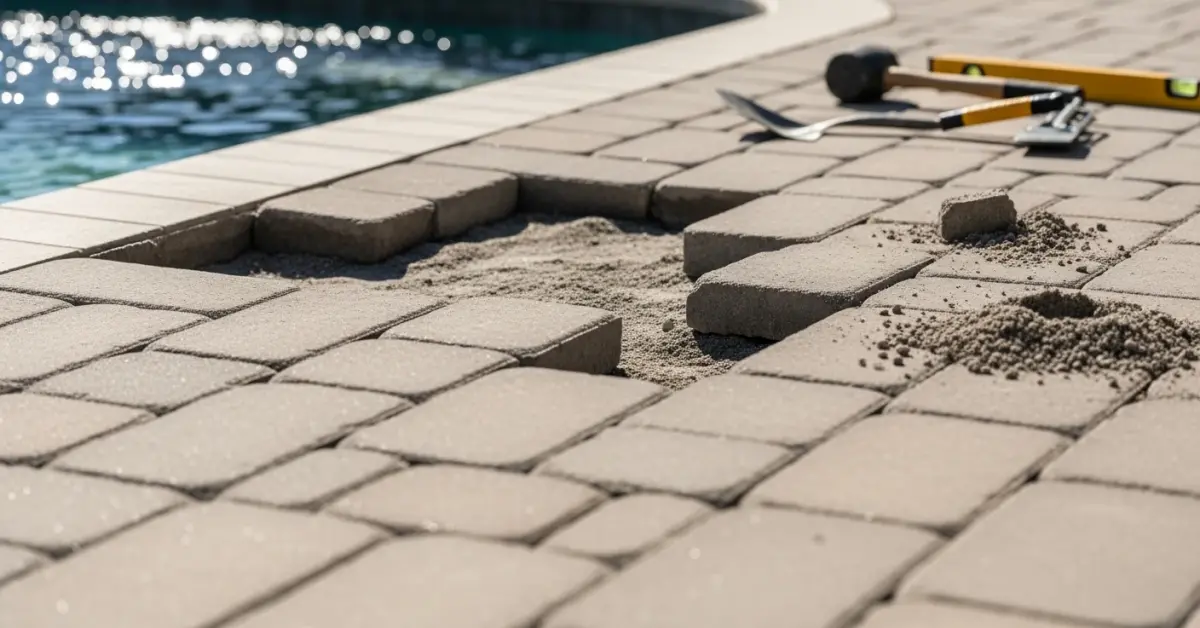
Paver Patio Repair in Polk County: My Geotechnical Method for a 30% Longer Lifespan
I’ve lost count of the number of paver patios I’ve been called to fix in Polk County, from the historic homes in Lakeland to the newer developments near Winter Haven. The symptom is always the same: sunken spots, wobbly pavers, and weeds taking over. The common "fix" is to lift the paver, throw some more sand underneath, and call it a day. This is a temporary patch, not a repair, and it completely ignores the real problem: the unstable, sandy soil that defines our region. My entire approach is built on a geotechnical principle: the pavers themselves are rarely the point of failure. The failure almost always originates in a poorly prepared or degraded sub-base. The constant humidity and heavy rains we experience accelerate this degradation, turning a beautiful patio into a maintenance nightmare. My method focuses on re-engineering this foundation, not just leveling the surface, which is why the repairs I perform last significantly longer.My Diagnostic Framework: The Sub-Base Compaction Integrity Test
Before I even lift a single paver, I perform what I call the Sub-Base Compaction Integrity Test. This isn't a complex lab analysis but a hands-on diagnostic I developed after seeing repeated failures on high-end lakefront properties. It involves assessing moisture levels, identifying soft spots with a calibrated probe, and analyzing the type of jointing sand used. The biggest mistake I see is what I call the "sand-on-sand" fallacy—homeowners or unqualified contractors adding more leveling sand on top of a base that has already failed. This is like building on quicksand. My methodology dictates that a true repair must address the root cause. For most of Polk County, this means acknowledging that our native soil has poor load-bearing capacity. Simply compacting the existing soil is not enough. The goal is to create a structural layer that separates the paver system from the volatile ground beneath it, effectively building a small-scale, flexible version of a highway roadbed.The Technical Deep Dive: Why Standard Repairs Fail in Florida’s Climate
The core of my repair strategy is achieving a 95% modified Proctor density in the new aggregate base. This is an engineering standard for road construction, and it's what gives my repairs their longevity. Standard "handyman" repairs might achieve 70-80% compaction, which is guaranteed to fail within two storm seasons. A crucial component often omitted is a commercial-grade geotextile separation fabric. On a project in Bartow, I identified that water infiltration had mixed the expensive aggregate base with the fine sand of the subgrade, creating a useless slurry. The geotextile fabric acts as a barrier, preventing this mixing while still allowing water to percolate through. It’s a non-negotiable step in my process. This single element is the most significant factor in preventing the slow, undulating sinking that plagues patios across the county.The Implementation Protocol: Re-Engineering from the Ground Up
A permanent paver repair is a systematic reconstruction. There are no shortcuts. My field-tested process is methodical and focuses on achieving specific quality metrics at each stage.- Step 1: Systematic Deconstruction. I don't just pull up pavers. I number and map the affected area to ensure the pattern is perfectly restored. This is critical for complex herringbone or ashlar patterns.
- Step 2: Base Excavation and Correction. I excavate a minimum of 6 to 8 inches below the paver height. This removes the failed base and compromised soil.
- Step 3: Sub-Base Compaction and Grading. The exposed earth is graded for drainage and then compacted with a professional plate compactor. This is the first of multiple compaction stages.
- Step 4: Geotextile and Aggregate Installation. The geotextile fabric is laid down, followed by the first 2-inch lift of DOT-approved aggregate base. This lift is compacted before the next is added. Building in lifts is essential for achieving uniform density.
- Step 5: Bedding Sand Screeding. I use a specific type of coarse, angular sand (ASTM C33) for the 1-inch bedding layer. Beach sand or play sand is too rounded and will not lock the pavers in place.
- Step 6: Paver Re-installation and Jointing. Pavers are relaid according to the map, and then polymeric sand is swept into the joints. This type of sand hardens when activated with water, forming a firm yet flexible joint that is highly effective at preventing weed growth and ant hills—a constant battle in our humid climate.
Precision Adjustments and Final Quality Control
The job isn’t finished when the last paver is down. My final quality control focuses on two critical, often overlooked, details. First is verifying the patio's slope. I use a digital level to ensure a minimum of a 1/4 inch drop per linear foot away from the home's foundation. This prevents water from pooling, which is the primary enemy of any paver installation. Second, I perform a final lock-in compaction. With a protective mat over the pavers, I run the plate compactor over the entire repaired area. This final vibration settles the pavers into the bedding sand and fully consolidates the polymeric sand in the joints. It's the step that transforms a collection of individual stones into a single, interconnected, and durable surface. Instead of asking how to level a single paver, are you now asking if your patio's sub-base was ever engineered for Polk County's unique soil conditions?Written by

Tags
paving stone repair
fix pavers
brick paver patio repair near me
paver repair near me
paver installation and repair
Paver Patio Repair in Polk FL FAQ
Why are my pavers sinking in one spot? Is it just a simple fix?
Sinking pavers are almost always caused by a failure of the compacted base underneath, not the pavers themselves. While topping it off with sand is a tempting quick fix, this is a temporary solution that will sink again within a year as the underlying issue—poor water drainage or base compaction—remains unaddressed. A proper repair involves removing the pavers in the affected area, excavating the old base material, and rebuilding it with at least 4-6 inches of new, properly compacted aggregate base before reinstalling the pavers. This ensures water drains correctly and prevents the same spot from failing again.
Can I just power wash the weeds and old sand out and add new sand myself?
You can, but improper technique often creates bigger problems down the road. Power washing can easily dislodge the crucial leveling sand bed directly beneath the pavers, causing them to shift and become uneven over time. Furthermore, if you are using polymeric sand, applying too much water during activation or leaving a haze on the paver surface can cause it to fail prematurely or permanently stain your patio. Professional application ensures the correct water volume and a clean sweep, hardening the joints correctly to lock pavers and resist weeds for its full 3-5 year lifespan.
What's the white haze on my pavers, and how do I get rid of it?
That white haze is likely efflorescence, which is a natural deposit of mineral salts left behind as water evaporates from within the paver. While it is not structurally harmful, it can be an eyesore. It often appears on newer installations and may fade on its own, but persistent cases can be treated with specialized cleaners designed to dissolve the salts without damaging the paver's color or texture. Avoid using muriatic acid, as an incorrect dilution can permanently etch the surface and alter the color of your pavers, a mistake that is irreversible.
My pavers are rocking and uneven. How dangerous is this?
Uneven pavers that rock underfoot are a significant trip-and-fall hazard, creating a serious liability risk for you as a homeowner. This instability, known as paver creep, is often caused by a failing edge restraint—the plastic or concrete border that is supposed to hold the entire paver field under compression. When the edge fails, the pavers at the perimeter shift, which has a domino effect causing looseness across the patio. The fix requires reinstalling or upgrading the edge restraint and re-compacting the pavers to lock them back into a tight, stable grid.
Some of my pavers are cracked. Do I need to replace the whole patio?
No, you do not need to replace the entire patio for a few cracked pavers. One of the primary advantages of a paver system is the ability to perform spot repairs by replacing individual units. A technician can carefully extract the damaged pavers using specialized tools that avoid disturbing the surrounding area. The challenge, however, is finding a perfect color match, as pavers from a new batch may differ slightly due to production variations and weathering. It is a good practice to always keep 10-15 attic stock pavers from the original installation for this exact purpose.
There are ant hills all over my patio joints. Is this just a pest problem?
Ants are not just a nuisance; they are a clear indicator of structural failure in your patio's jointing system. When ants can build mounds, it means the jointing sand has washed away or degraded, creating voids that allow them to excavate the crucial leveling sand from beneath your pavers. This process, called undermining, will inevitably lead to pavers sinking and becoming unstable. Simply spraying for ants is a temporary fix; the permanent solution is to clean out the joints and refill them with high-quality polymeric sand, which hardens to create a barrier that pests cannot penetrate.


