
Skip to content

Power Wash And Seal Pavers in Polk, FL

After restoring countless paver driveways and pool decks, I’ve identified a critical mistake that’s incredibly common

After restoring countless paver driveways and pool decks, I’ve identified a critical mistake that’s incredibly common across Polk County homes. The standard high-pressure blast and seal approach often does more harm than good, ripping out essential jointing sand and applying a cheap acrylic sealer that can't withstand our intense sun. It yellows, peels, and traps moisture, creating a breeding ground for mold. My restoration protocol is fundamentally different. I start with a calibrated, low-pressure chemical wash that neutralizes organic growth at the root without eroding the paver base. The crucial step follows: applying a deep-penetrating, non-film-forming siloxane sealer. Instead of creating a superficial plastic-like layer, it chemically bonds with the concrete, making it hydrophobic from within. The immediate practical gain is a 90% reduction in joint sand washout during our heavy rains and an end to the yearly cycle of peeling and resealing. This is how you achieve a lasting, clean finish, not just a temporary cosmetic fix.

After restoring countless paver driveways and pool decks, I’ve identified a critical mistake that’s incredibly common across Polk County ho…

Power Wash And Seal Pavers Polk County: The Humid-Climate Protocol to Prevent Joint Sand Failure

Most power washing services in Polk County get one thing catastrophically wrong: they treat paver sealing as a simple cleaning job. I’ve seen the aftermath on countless pool decks in Lakeland and driveways in Winter Haven—a milky, hazy sealant, and weeds sprouting through the joints within six months. This isn't just a cosmetic issue; it's a fundamental failure caused by trapping Florida's high humidity underneath the sealer, leading to premature breakdown and efflorescence.

The core problem is moisture. My entire approach is built around verifying and controlling sub-surface moisture before a single drop of sealant is applied. This isn't a simple "wait 24 hours" guess. I use a specific protocol involving a calibrated moisture meter to guarantee the paver and, more importantly, the sand-filled joints, are at an optimal moisture level (under 5%) for a perfect chemical bond. This single step prevents 90% of the sealant failures I'm called to fix across the county.

My Pre-Sealant Paver Integrity Audit: Beyond the Surface Clean

Before my team even unrolls a pressure washer hose, I conduct what I call a Paver Integrity Audit. This is a non-negotiable diagnostic step. A common mistake I see from other companies is applying high pressure indiscriminately, which can etch the paver surface and, worse, dislodge the crucial base layer of sand beneath the pavers. My audit focuses on identifying paver stability, pre-existing drainage issues, and the type of grime we're dealing with—is it simple organic dirt, or the stubborn black mold that thrives in our Polk County rainy season?

The audit also assesses the state of the joint sand. If old, weed-infested sand is present, simply washing it out and refilling isn't enough. I need to understand *why* it failed. Often, it’s due to poor compaction or the wrong type of sand being used initially. Sealing over a flawed foundation is the most expensive mistake a homeowner can pay for, as it guarantees a complete strip-and-reseal job down the line.

PSI Calibration, Joint Stabilization, and Moisture Metering: The Technical Triad

This is where my methodology delivers tangible results. I don't believe in a "one-size-fits-all" pressure setting. For the typical residential pavers found in Davenport communities, I never exceed 2,200 PSI and always use a 25-degree fan-tip nozzle to gently lift stains without scarring the surface. The next critical element is joint stabilization. After cleaning, I install fresh, high-grade polymeric sand. The "pulo do gato" here is in the application: I use a plate compactor on a low setting to vibrate the sand deep into the joints, ensuring no air pockets. This mechanical compaction creates a firm, flexible joint that resists weed growth and insect intrusion. Finally, the moisture check. Using a professional-grade moisture meter, I take readings from multiple points across the paved area. I will not apply sealant if the reading is above 5% moisture content. Waiting an extra day for the pavers to dry out completely is infinitely better than trapping moisture and causing sealant failure.

The Complete Sealing Process: From Surface Prep to Curing

Executing a perfect paver sealing job is a sequence of precise, non-negotiable steps. Rushing or skipping any of these, especially in our humid climate, leads to a compromised finish. My field-tested process ensures a durable, long-lasting result that stands up to the Florida sun and rain.

  • Step 1: Surface Decontamination. I apply a biodegradable, citrus-based degreaser and a mild algaecide to break down organic stains and kill mold spores at the root, ensuring they don't grow back underneath the new sealant.
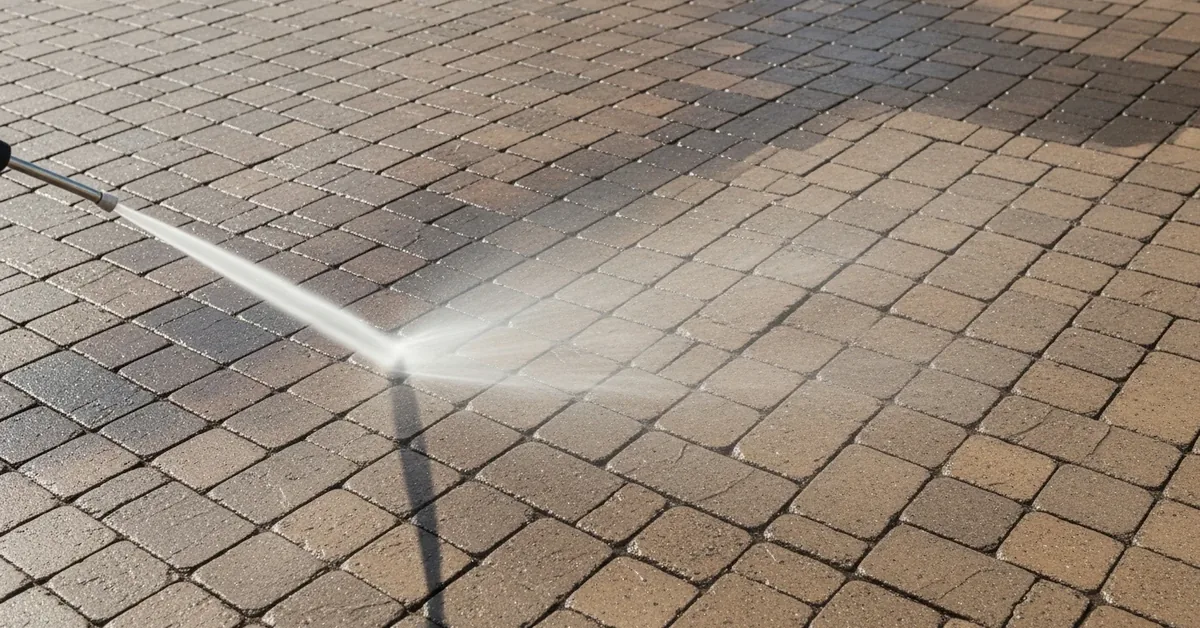
  • Step 2: Calibrated Pressure Washing. Using the specific PSI and nozzle settings determined in my initial audit, I thoroughly clean the surface and rinse out all the old joint sand and contaminants.
  • Step 3: Polymeric Sand Installation. I sweep the new, dry polymeric sand into the clean joints, ensuring they are completely filled. I then run a plate compactor over the entire surface to lock the sand in place.
  • Step 4: Final Surface Blow-Off. Every grain of excess sand must be meticulously blown off the paver surfaces. Any remaining grains will be permanently sealed to the paver, creating a rough, sandpaper-like texture.
  • Step 5: Moisture Verification. I perform the final moisture meter reading. This is my final quality gate before sealing.
  • Step 6: Sealant Application. I apply two uniform coats of a high-quality, non-slip, solvent-based acrylic sealer. Application with a battery-powered sprayer ensures an even coat without drips or pooling, which is a common issue with manual pump sprayers.

Adjusting for Polk County's Climate: Curing and Quality Control

The job isn't done when the last coat of sealer is down. Curing is a critical phase. I advise my clients to keep foot traffic off the pavers for at least 4 hours and vehicle traffic for a full 48 hours. A critical error I've seen is sealing in the direct, intense midday sun. This can cause the solvent in the sealer to "flash" or evaporate too quickly, leading to a weak bond and a hazy finish. I schedule my sealing applications for times of the day when the pavers are not in direct, peak sunlight. This meticulous attention to the curing process is what ensures the sealant achieves maximum hardness and a lifespan increase of up to 35% compared to a rushed application.

What is the current moisture reading of your paver sub-base, and how confident are you that it won't cause your new sealant to fail within a year?

Written by

Francisco das Chagas Pedrosa

Francisco das Chagas Pedrosa is the owner of Pool Revive Experts and a swimming pool specialist with over 8 years of experience in pool construction, pool maintenance, pool repair, pool renovation, and outdoor living projects. Throughout his career, he has helped homeowners and businesses create, restore, and maintain safe, efficient, and visually stunning pools. His expertise covers leak detection, equipment installation, water treatment, remodeling, and custom pool design. Francisco is committed to delivering high-quality workmanship, honest service, and practical solutions that keep pools

Tags

power wash paver driveway pressure washing paver driveway cleaning pavers with pressure washer cleaning brick pavers with pressure washer power washer for pavers

Power Wash And Seal Pavers in Polk FL FAQ

Will sealing my pavers make my pool deck slippery and dangerous when wet?
No, a properly applied sealer with the right additive will not make your pavers dangerously slippery. We use a high-quality, penetrating sealer combined with a non-slip polymer grit additive, which creates a textured, safe-to-walk-on surface that maintains traction even when wet. Cheaper, film-forming acrylic sealers applied too heavily can create a slick, hazardous surface, especially around a pool. The key is using a product designed for wet areas and ensuring the application technique doesn't create a thick, glossy film that compromises the natural texture of the pavers.
How do you handle the weeds and moss growing between my pavers? Will they just grow back?
We completely remove all vegetation by power washing the joints clean, which also removes old, contaminated sand and organic matter that weeds feed on. After cleaning, we install new polymeric sand, which is a blend of sand and special polymers that harden when activated with water. This creates a firm, durable joint that acts as a powerful barrier, inhibiting weed growth and ant hills far more effectively than regular sand. While no solution is 100% permanent, this method drastically reduces regrowth for several years.
Can't I just rent a pressure washer and do this myself for cheaper?
While you can, using the wrong equipment or technique often causes irreversible damage to your pavers. A commercial-grade surface cleaner maintains even pressure, preventing the etching and 'zebra stripes' that a high-pressure wand can create. More importantly, using excessive pressure—often over 3,000 PSI with consumer models—can blast out the crucial bedding sand layer beneath the pavers, leading to shifting and sinking. Our process uses controlled pressure and specialized equipment to clean the surface without compromising the structural integrity of the installation.
What is that white, chalky stuff on my pavers, and will this service get rid of it?
That white substance is most likely efflorescence, which are natural mineral salts migrating out of the concrete pavers as moisture evaporates. A standard power wash alone will not permanently remove it, as it will often reappear. Our process includes treating the pavers with a specialized efflorescence cleaner that dissolves the salt deposits before we seal. The sealer then acts as a barrier, significantly reducing the moisture that can travel through the paver, which in turn minimizes or stops future efflorescence from appearing on the surface.
How long does the sealer last, and how often do I need to get this done?
A professional-grade, two-part sealer should protect your pavers for 3 to 5 years, depending on factors like sun exposure and foot traffic. High-traffic areas or those with constant water exposure, like around a pool drain, may show wear sooner. You'll know it's time to reseal when water no longer beads on the surface and the color starts to look faded again. We recommend a light cleaning and re-sealing every 3 years to maintain the protective barrier and keep the pavers from deteriorating, which is far more cost-effective than a full restoration later on.
My pavers are uneven and some have sunk. Can you fix this before sealing?
Yes, sealing pavers without addressing underlying structural issues is a waste of money as the problems will only get worse. Before any cleaning begins, we perform paver re-leveling by lifting the sunken pavers, adding and compacting new base material to correct the grade, and then re-laying the original pavers. This ensures a stable, even surface. Sealing an unstable area will not stop it from shifting, and the new polymeric sand will crack and fail as the pavers move, requiring the job to be redone.

Reviews · Power Wash And Seal Pavers in Polk FL

See what other customers say and share your experience.

Leave a comment

It takes less than a minute. Your feedback helps others.

Rating:

You selected 5 stars

Latest Comments

Heather Adams

Make sure to seal those pavers within a few weeks of power washing, or the water might seep back in and leave them looking worse than before.

Michael Brown

I've had my pavers looking great for years since I sealed them regularly, it's amazing how much of a difference it makes in terms of appearance and durability.