
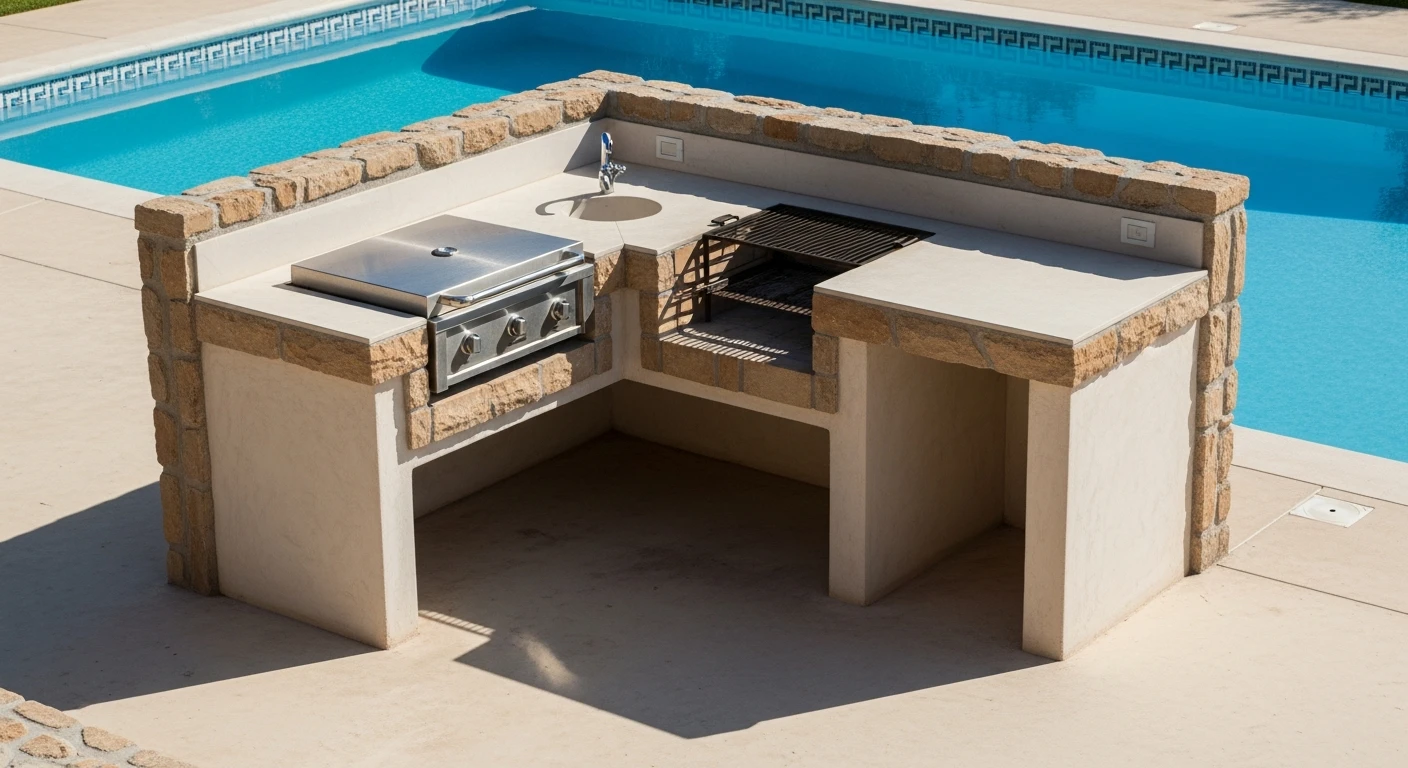
L-Shaped BBQ Island: My Framework for a Zero-Failure Install in Osceola County's Climate
Designing an L-shaped BBQ island in Osceola County isn't about picking the prettiest stone veneer. I learned this the hard way after being called to fix a two-year-old outdoor kitchen in a beautiful Celebration home. The powder-coated steel frame had rusted through from the inside out due to constant humidity, and the granite countertop was covered in mold spots from moisture penetration. The client had a beautiful failure on their hands. This experience forced me to develop a proprietary methodology focused entirely on mitigating the specific environmental stressors we face here, from the relentless sun in Kissimmee to the damp, still air common in St. Cloud lanais. My approach isn't a simple checklist; it's a structural and material science framework designed to guarantee a minimum 15-year structural lifespan without critical failure. Standard designs you see online or from big-box retailers are often developed for arid climates like Arizona and simply don't account for the intense moisture and UV degradation here. The key is engineering for ventilation and using materials that are inherently resistant to our climate, not just coated to look like they are.The Humid-Climate Durability Protocol: My Diagnostic Framework
Before any design is sketched, I run every project through what I call the "Humid-Climate Durability Protocol." It's a non-negotiable diagnostic I developed after seeing repeated failures in outdoor kitchens across the Poinciana area. The protocol assesses three critical failure points: internal moisture accumulation, material degradation, and improper load-bearing for integrated appliances. A common mistake I see is a beautifully finished island with zero internal airflow, creating a terrarium for mold and rust. My protocol directly addresses this by mandating specific ventilation and material choices from the foundation up.Technical Deep Dive: Core Material and Ventilation Specifications
The core of my protocol is a shift away from aesthetics-first design to a materials-first philosophy. In Osceola, the material dictates the design, not the other way around. Here’s a breakdown of my non-negotiable specifications:- Framing Integrity: I exclusively use 20-gauge galvanized steel studs or, for premium projects, aluminum. I've seen wood-framed islands completely rot out in under five years. The galvanized coating is critical for preventing the insidious rust that destroyed the Celebration project I mentioned.
- Appliance Casing: All drop-in appliances, from grills to side burners, must be specified as 304-grade stainless steel. This grade contains sufficient chromium and nickel to resist the pitting and corrosion caused by our salty, humid air, especially for clients closer to the coast. It’s a significant, but necessary, cost increase over the more common 430-grade steel.
- Engineered Ventilation: Every island I design incorporates passive cross-ventilation baffling. This means installing screened vents on at least two sides of the structure, typically low on one side and high on the opposing side, to create a natural chimney effect. For islands housing propane tanks, this is a critical safety feature to prevent gas accumulation, a risk I’ve had to educate many homeowners on.
- Countertop Selection: I steer clients away from porous natural stones like granite unless they commit to a rigorous biannual sealing schedule. My preferred material is Dekton or another ultra-compact surface. Its non-porous nature means zero water absorption, preventing mold growth and staining from fallen leaves or spilled drinks during a summer downpour.
My Site-Specific Implementation Process
Once the materials are specified, the implementation phase is about precision. Over the years, I've refined my process to eliminate common installation errors that can compromise even the best materials. This is my personal workflow for every L-shaped island project in the region.- Step 1: Concrete Pad Verification: I start by ensuring the concrete pad is properly cured and sealed. I perform a moisture test. If the pad is unsealed, I apply a high-grade penetrating sealer to prevent moisture from wicking up into the island's frame. This is the most frequently skipped step by general contractors.
- Step 2: Utility Mapping & Installation: Before any framing, I map and run all utilities. This includes a dedicated GFCI-protected electrical circuit for outlets and refrigerators and a professionally installed gas line with a clearly accessible emergency shut-off valve.
- Step 3: Frame Assembly & Leveling: The steel frame is assembled directly on the pad. I use a laser level to ensure the entire structure is perfectly level to within 1/16 of an inch. An unlevel frame puts stress on countertop seams and appliance housings, leading to cracks over time.
- Step 4: Cladding and Backer Board: I use cement backer board, never drywall or green board. The seams are taped and mudded with a polymer-modified thin-set mortar, creating a monolithic, waterproof shell before any veneer is applied.
- Step 5: Appliance Fitment & Testing: All appliances are dry-fit before the countertop template is made. I fire up the grill and all burners to ensure proper gas flow and check for any immediate operational issues before they are permanently installed.
Post-Installation Quality Control: The 5% That Defines Longevity
The final phase is what I consider my quality guarantee. After the countertop is installed and the veneer is complete, I conduct a final audit. This involves a meticulous check of all grout lines, applying a second coat of impregnating sealer to the stone veneer. I also perform a low-pressure soap-water leak test on every gas fitting to provide the client with absolute peace of mind. This final 5% of effort is what prevents callbacks and ensures the island performs flawlessly through years of Osceola County’s punishing weather cycles. It’s the difference between a functional island and one that becomes a landmark in your backyard. Now that you understand the material science required to combat our local climate, have you considered how the orientation of your L-shaped island will affect airflow and smoke diversion during a typical humid, low-wind summer evening?Written by

Tags
l shaped outdoor bbq
l shaped outdoor bbq island
l shaped outdoor kitchen layout
l shaped outdoor kitchen with pizza oven
l shaped outdoor kitchen with pergola


